|
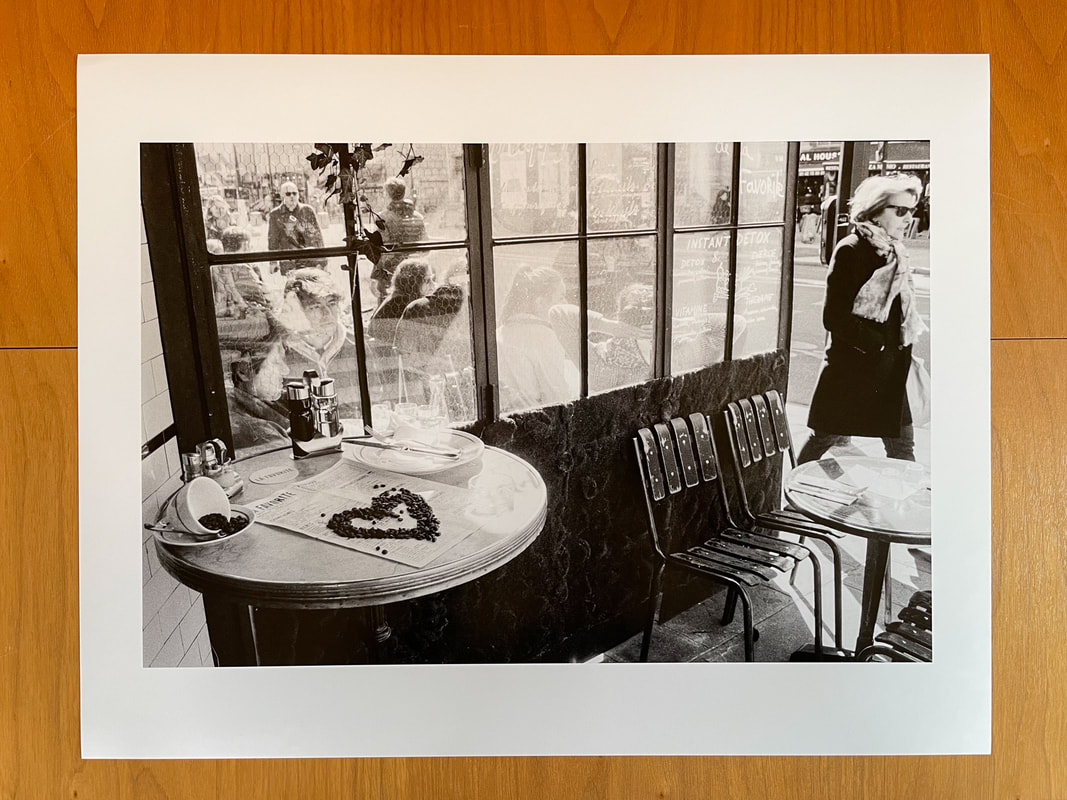
One of the commonly mentioned dings against 35mm is that you can't or shouldn't attempt to make large prints with it. Well, I'm hoping to debunk that myth in this blog post. What I will provide for you is my workflow from beginning to end for getting beautiful, 13" x 19" archival inkjet black & white prints from 35mm negatives. First, a list of the gear and software I will use along the way. Equipment/Software:
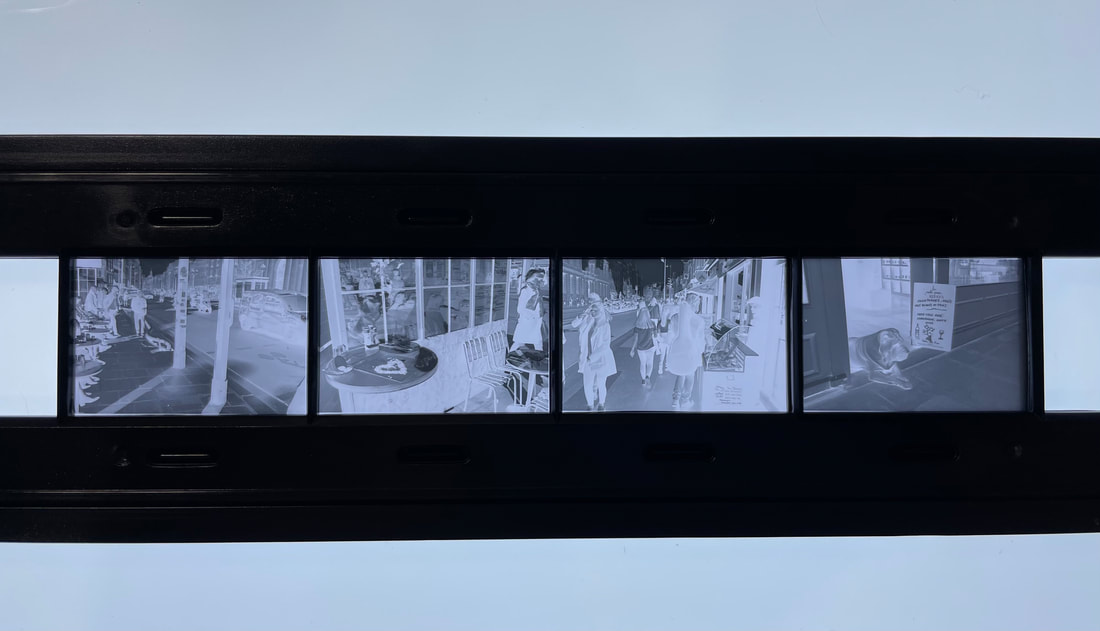
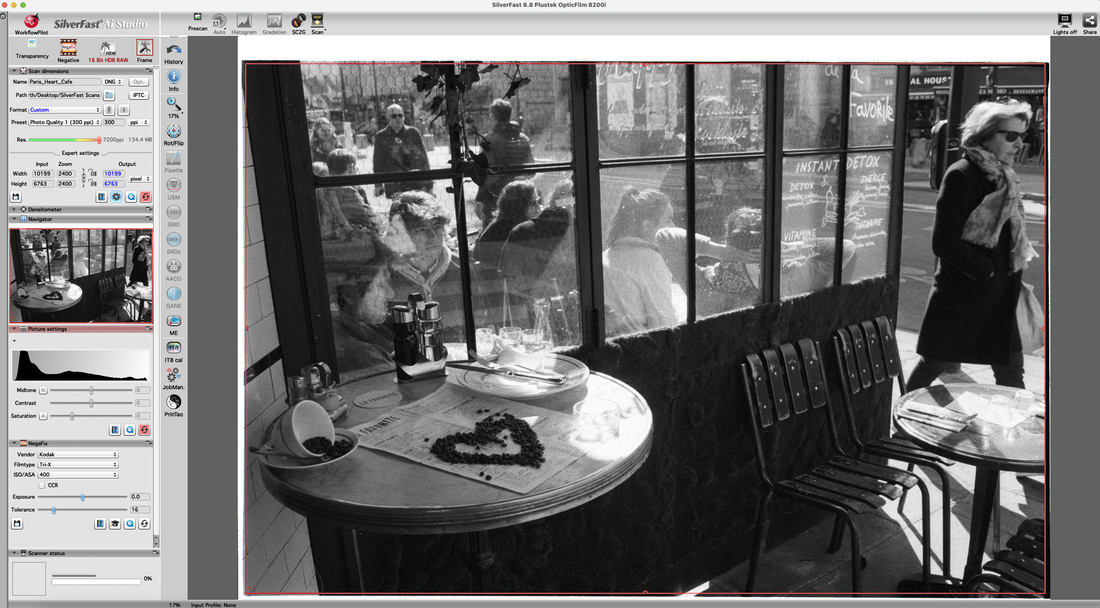
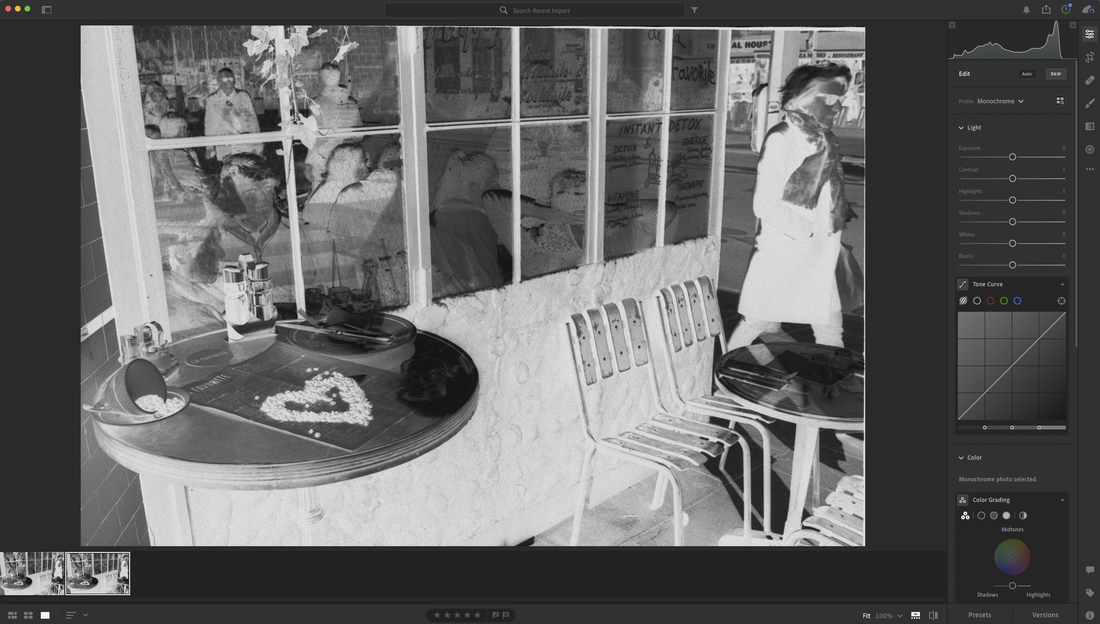
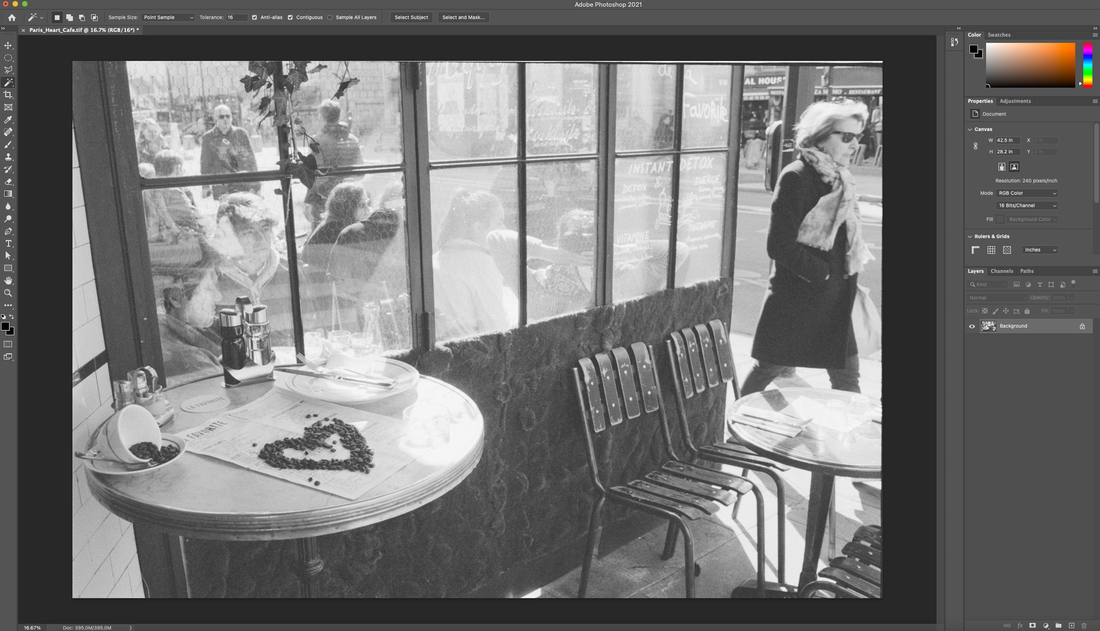
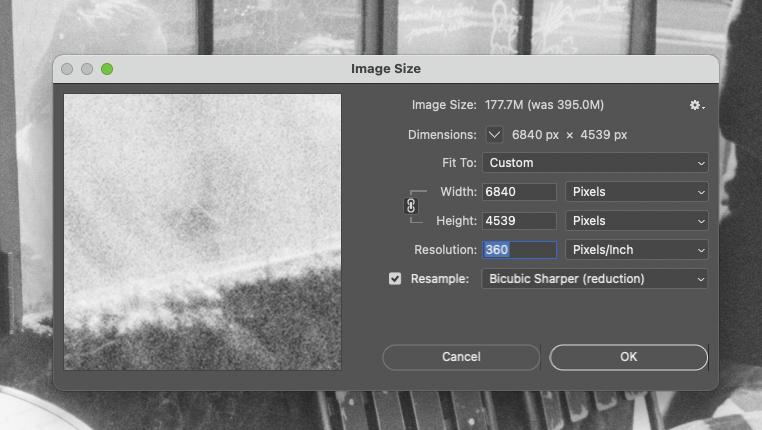
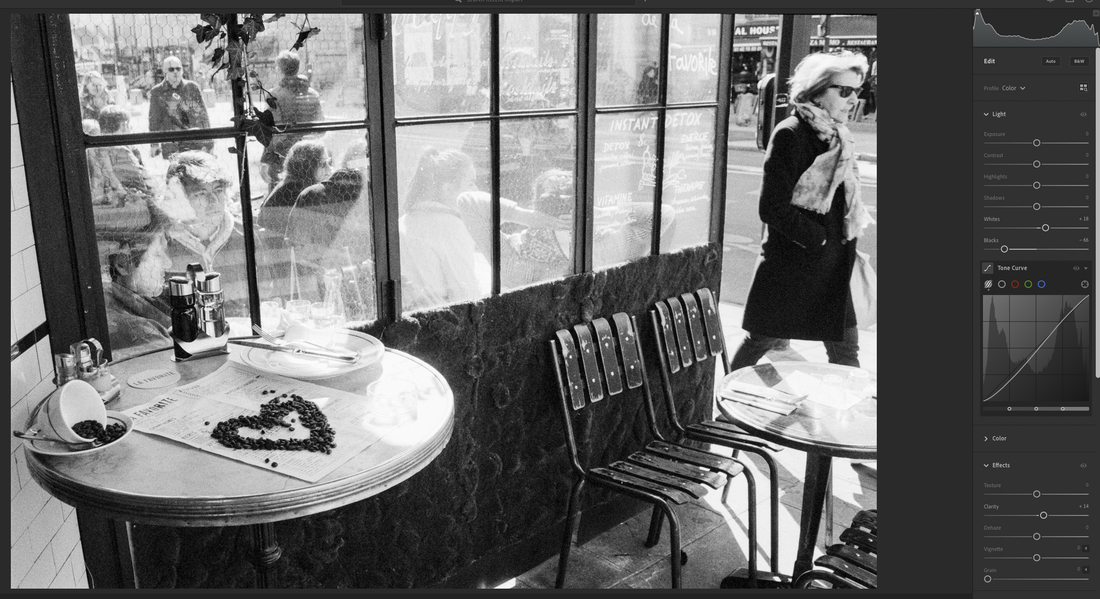
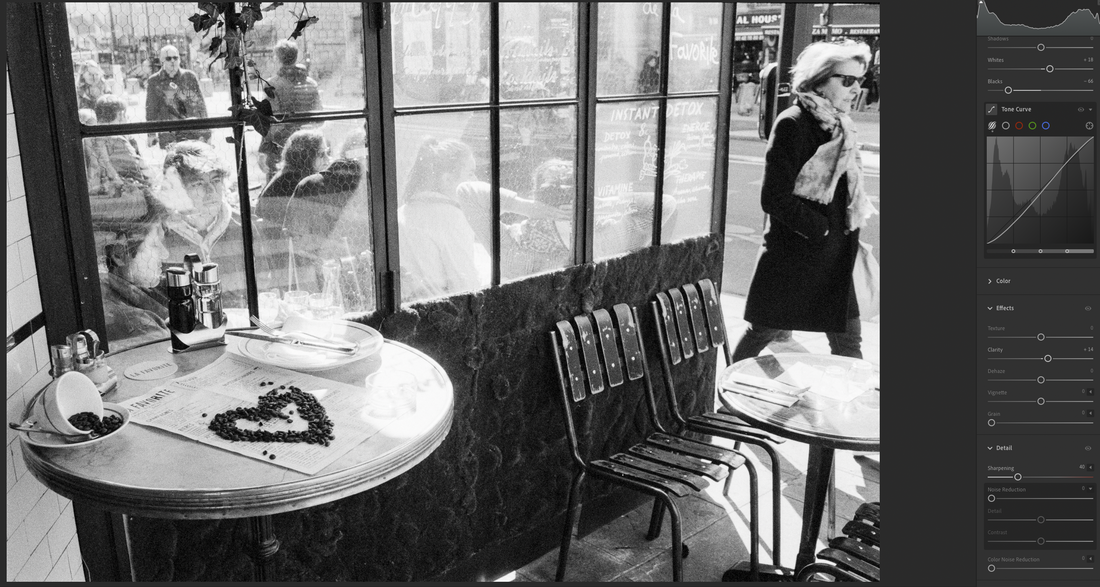
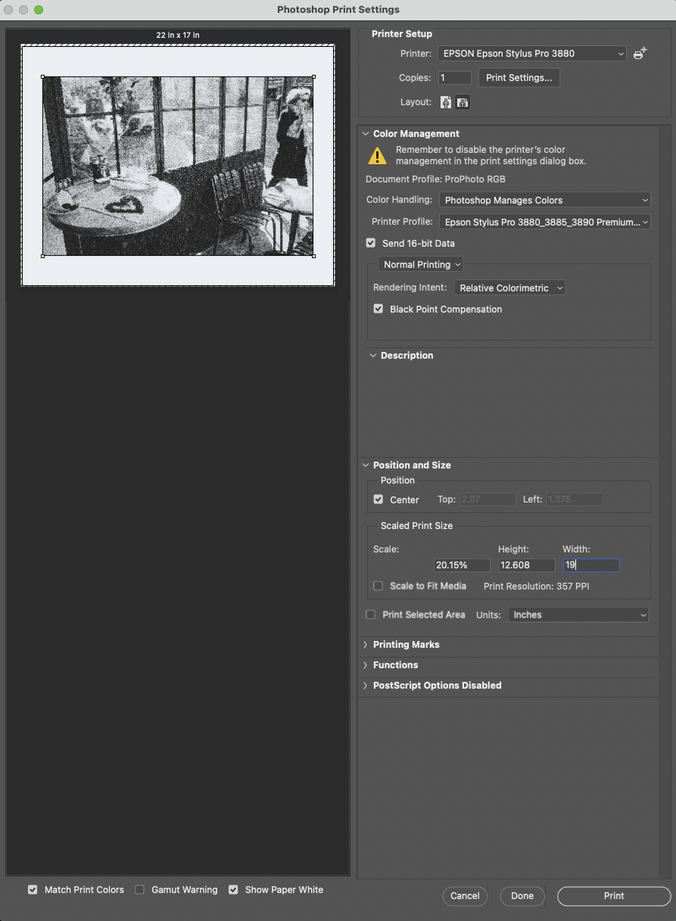
Workflow Steps: The first step is to place the negative in the scanning tray and get it cleaned. I find it helps me to see the borders clearly by putting the tray and negative on an LED light table (these are super affordable). Once I get the negative placed and locked in, I give it a good blowing with a Rocket Blower front and back. Next I'll walk through the settings in SilverFast. The first thing I do when I open SilverFast is conduct a Prescan. Once I have that, I make sure that the red selection box is sized properly. All of the settings are shown on the left panel. I won't go over all of those, but a couple are of special importance. First, I select 16 Bit HDR RAW for my scan type. I only use this scan type when I'm planning on making a large print. This will create a digital negative of the image. I select DNG for file type. You could probably use TIFF as well. This next setting is the one where I go outside accepted bounds. I set the scan resolution to the greatest allowed by the 8200i, which is 7200 ppi. Reviews will tell you that the effective resolution of this scanner is closer to half that, so the argument is that you shouldn't scan at a resolution greater than 3600 ppi because all you're getting is a bigger file with no more detail. I've tried up-sizing files scanned at 3600 ppi to the print size needed, and the results aren't nearly as good. What I found is that the shadows get super dirty, for lack of a better term. So believe me, while you are not gaining effective resolution scanning at 7200, you are getting a cleaner file to work with downstream. I use SilverFast's NegaFix option on all my scans. I find it does a fabulous job rendering the negatives. I don't use any of the auto color correction options. Once I've named my file and told SilverFast where to store it I hit the Scan button and let the Plustek do its thing. Once you import the file into Lightroom (I'm using CC) you will see a digital negative on the screen. At this point I don't do anything with the image other than choose Edit in Photoshop. When the file opens in Photoshop it will still look like a negative. At this point I use Photoshop for just two processes. First I choose Image>>Adjustments>>Invert. Now the image looks like an extremely flat positive. Don't worry about that. We'll fix that in Lightroom. The next step I do in Photoshop is to resize the image by choosing Image>>Image Size and then make the settings shown below. To get a 13" x 19" print at 360 ppi, which is optimal for my Epson, I need to downsize the file to 6840 pixels on the long side. For the resampling choice, I use Bicubic Sharper (reduction). To be honest, I haven't tried the other options. This one just works for me. Once I execute the image size command I'm all done with Photoshop. I save the file in Photoshop and then quit Photoshop to go back to Lightroom. Now I am back in Lightroom, and here is where we start to bring the image to life. The first thing I do is set the white and black points to taste. This alone makes a huge difference in the tonalities. Next I adjust the tone curve. I added a bit of an S-curve to this image. I also added a bit of Clarity. Finally, I set sharpening to the Lightroom default level of 40. Other than some minor use of the healing brush, this image is ready to print. Because I'm using Lightroom CC, and because Adobe for some unknown reason didn't think printing was important enough to include in CC yet, I have to go back into Photoshop to print. Annoying, yes, but it is doable. Now I am back in Photoshop in the Print dialog. The settings here are super critical. Besides selecting my printer, I tell Photoshop that it should manage colors and I select the proper icc printer profile. I select 16-bit data and black-point compensation. In the Layout section I choose landscape orientation. Down in the Position and Size section I input the width and let Photoshop auto calculate everything else. You'll see that the image isn't exactly 360 ppi because I did a wee bit of a crop. I'm not going to worry about that. In Rendering Intent, I've found Relative Colorimetric to be my preferred method, so I just leave it at that. I doubt that has much impact on a black and white image anyway. And then all that's left is to hit the Print button. I've shown the resulting print at the beginning of the blog post, so I won't repeat that here, but what I will do is include a slideshow of a series of closeup photos from the print made on my iPhone 12 Pro. Now I'll be the first to admit that I am not a pixel peeper. When I'm making a large print, I keep in mind the typical viewing distance. To be honest, I could probably be printing at a resolution much lower than 360 ppi for such a large print as 13" x 19", but 360 ppi is what makes my Epson happiest, so that's what I stick with. Certainly looked at close up you're going to see the film grain, especially on a 400 speed classic grain film like Tri-X. But frankly, I like grain. Maybe not big chunks of it, but salt and peppery grain I'm more than happy with. And that's the way the grain looks to me on this print.
A caveat...the scanner is the critical element of this workflow. I don't think you'd get nearly as good of results with a flatbed scanner. This is where a dedicated film scanner really comes in handy. The Plustek film scanners are a terrific value and a great choice if you're looking for a dedicated 35mm film scanner. I hope this has been helpful. As always, if you've got a question just send me a note or post a comment.
1 Comment
Chris Rusbridge
4/13/2021 02:39:36 am
Very interesting post, thanks. Martin Henson did a video a while ago of a similar approach with some extra details that you might find interesting. I think this is it: https://www.youtube.com/watch?v=75kDm7dap4g
Reply
Your comment will be posted after it is approved.
Leave a Reply. |
AuthorTom Northenscold Archives
December 2022
Categories
All
|
|
Tom Northenscold Photography
[email protected] |
Proudly powered by Weebly
|
 RSS Feed