|
My daughter, Anna, accuses me of treating my cameras like my children. I suspect there’s more than a kernel of truth in that. It's a good thing they're not though, as we'd be in the poorhouse given the number of them. The gallery below includes all the film cameras that I regularly shoot. As camera collections go, mine is on the small side. True collectors often have dozens of cameras. I am at the point with my collection where if I add a camera I feel the need to move another one out. I’m not looking to increase the number of cameras. Originally I started accumulating 35mm film SLRs to use for a film workshop I was leading with the youth of our church. Well, let’s just say that was the spark that lit the fire. I honestly don't consider myself a collector, in the sense that I shoot every one of these cameras on a regular basis. I don't keep them for show and don't have them in a fancy display case. I don't get all excited about what serial number the camera is or whether it came with the original box. I just want them to work. They sit on a shelf in my office, and when I'm set to load a new roll of film I take a look at the negative sleeves to see which camera hasn't seen much love lately. 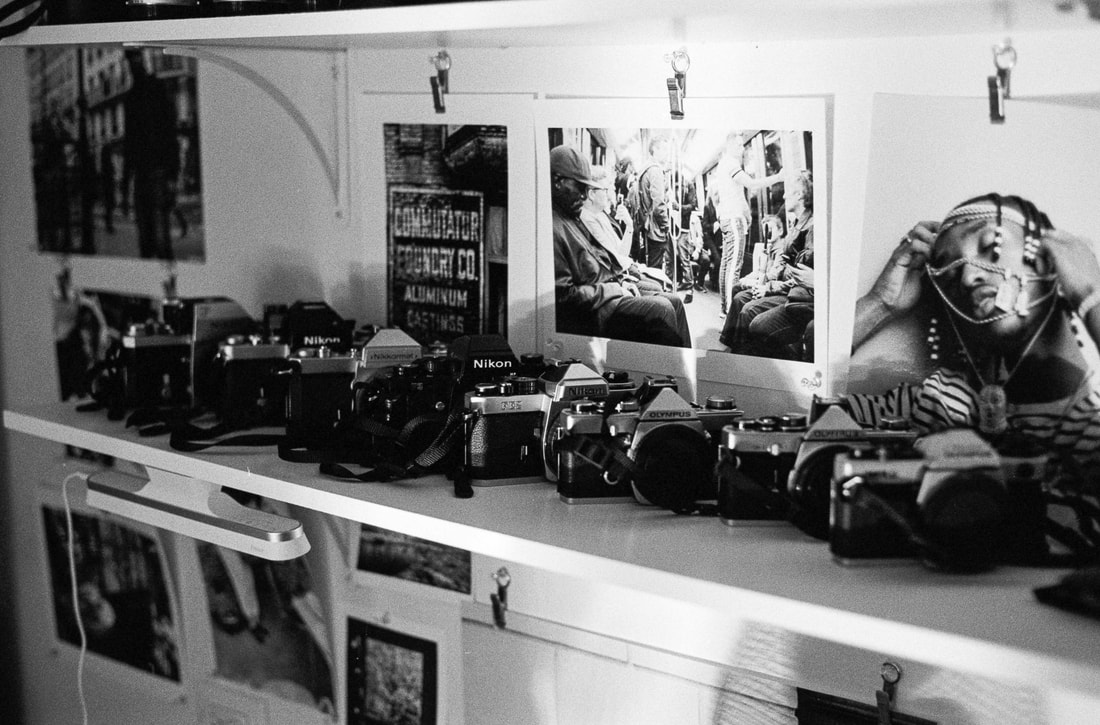 I thought it would be fun to quickly run down how these cameras came to me and what I think of them. By the way, the cameras are shown below by the vintage of the camera within make, with the oldest being mid-1930s vintage and the newest being 2002. Most are from the 70s and 80s. Kodak Duo Six-20 Art Deco: This was the camera I first learned photography on back in 1969. The one I used then was given to me by my Dad. I picked this copy up last year, looking to get back to my film roots. The Art Deco version came out in the mid-1930s. As the name would suggest, this camera has beautiful art deco styling. It was made at Kodak's plant in Stuttgart, Germany. It is manual everything. There is no meter or focusing aid. You guess the distance to your subject and then let depth of field handle the rest. I use a small, handheld external meter. The Six-20 in the name refers to an obsolete format of Kodak film that this camera used. Fortunately, there are options to shoot readily available 120 medium-format film in this camera. I still have the original camera I used in 1969, but, sadly, it's not in working condition.
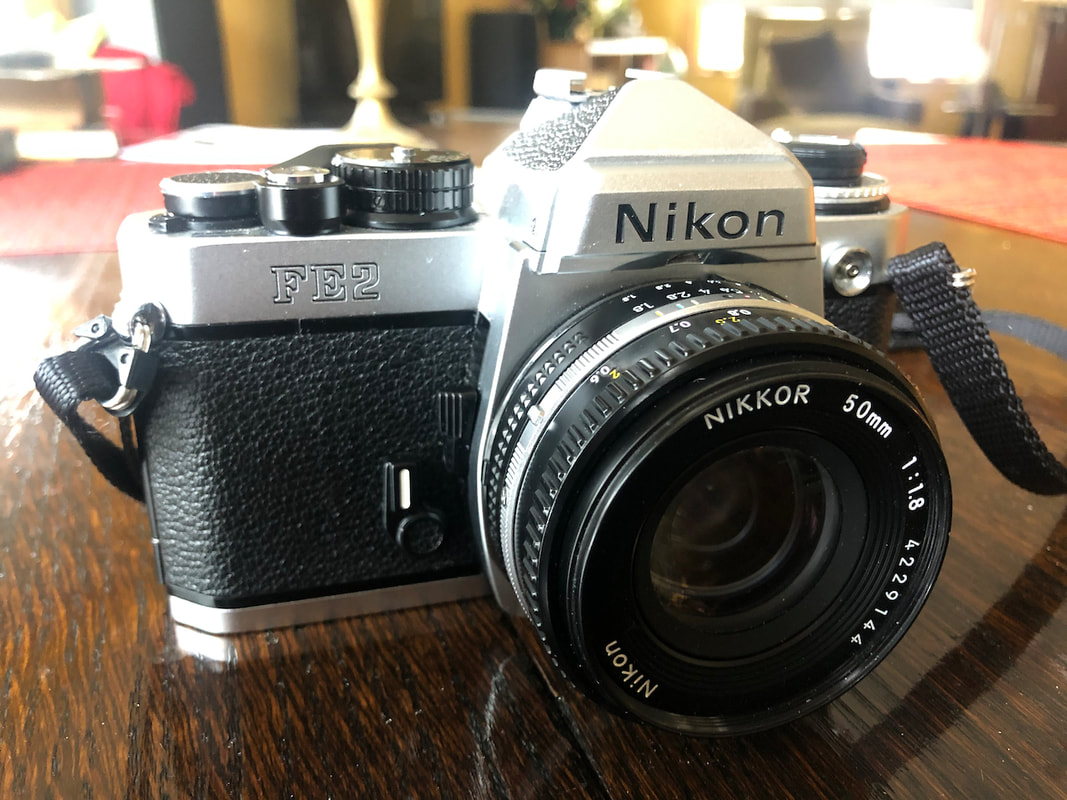
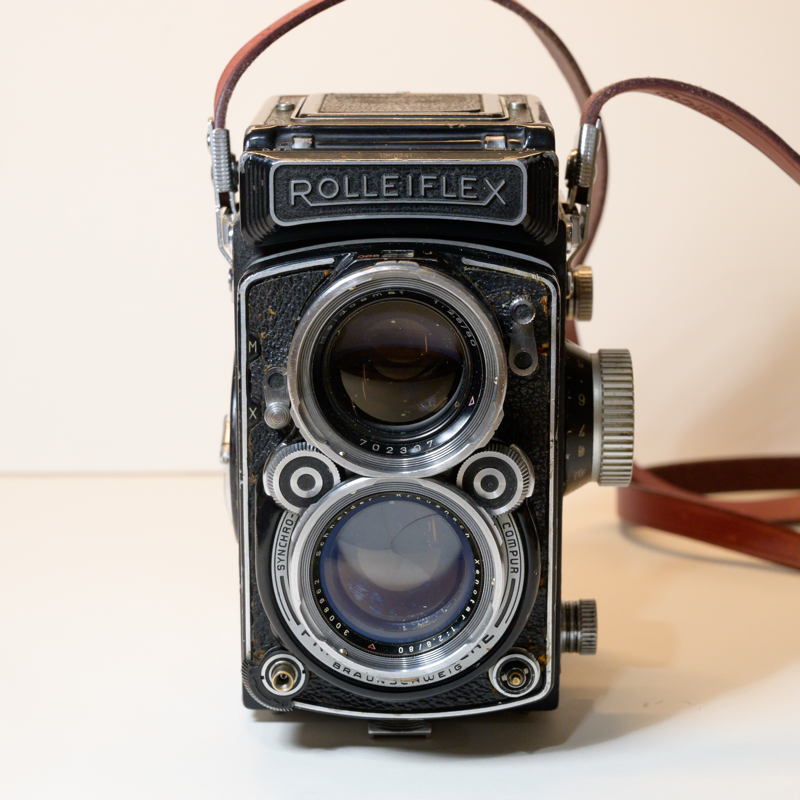
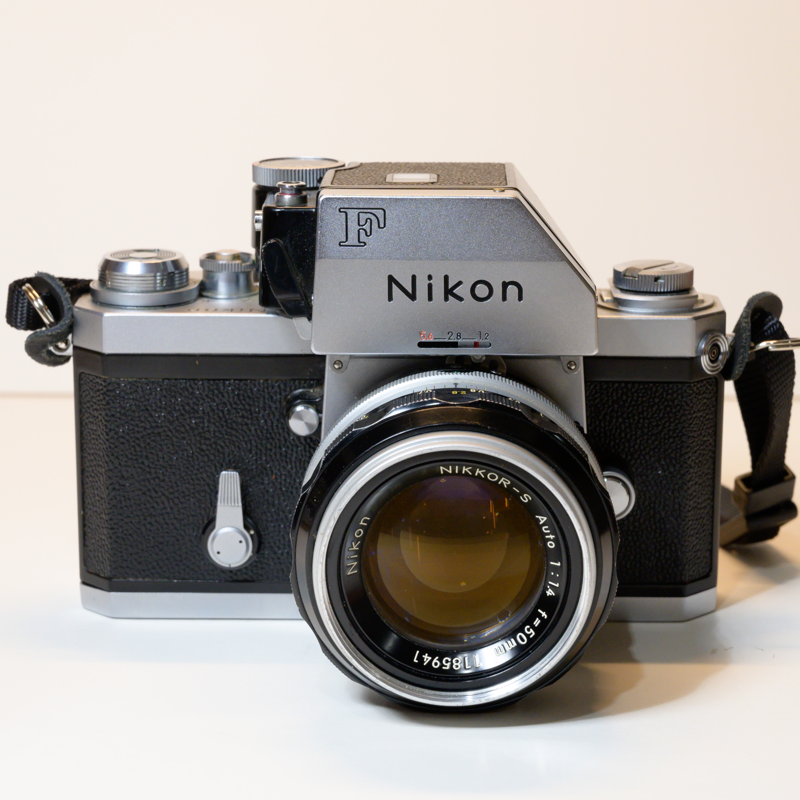
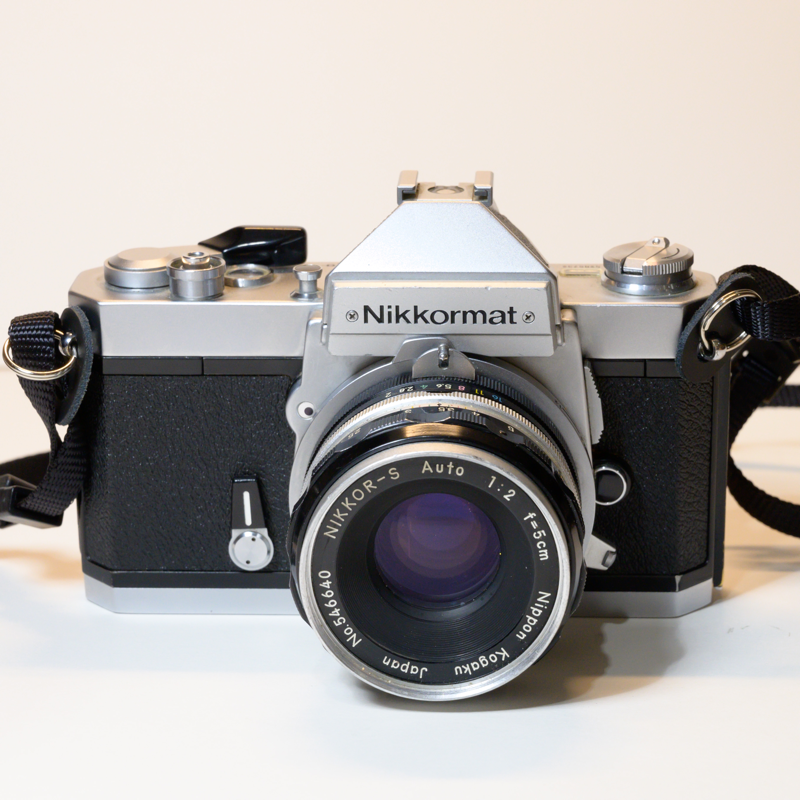
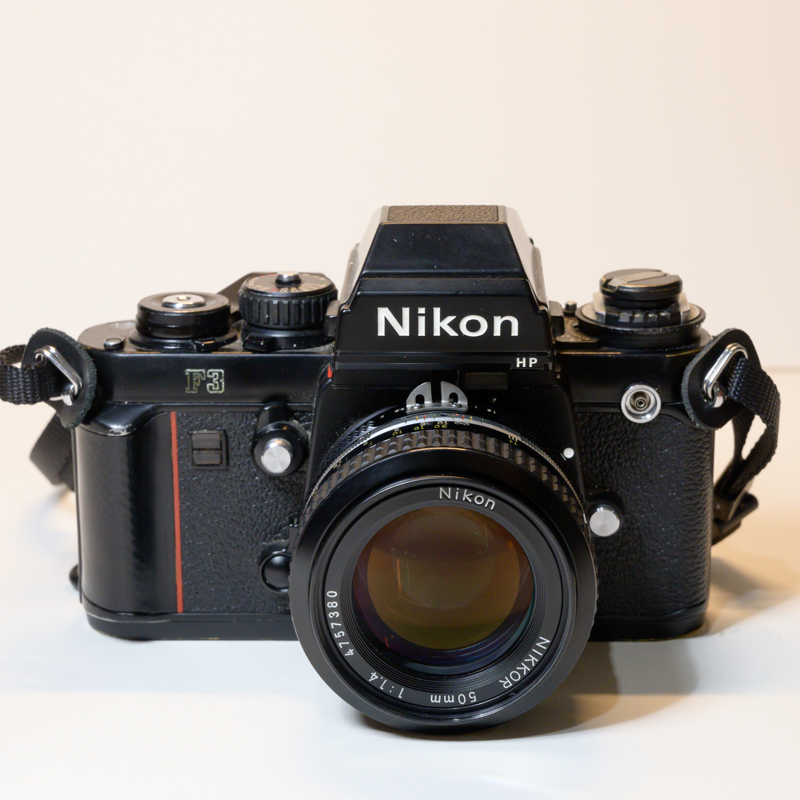
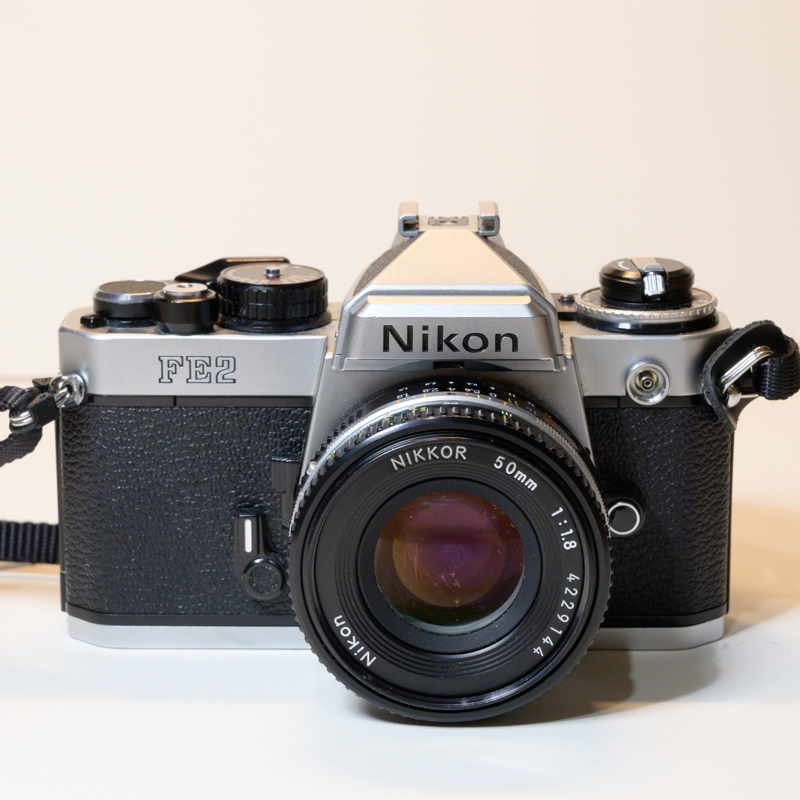
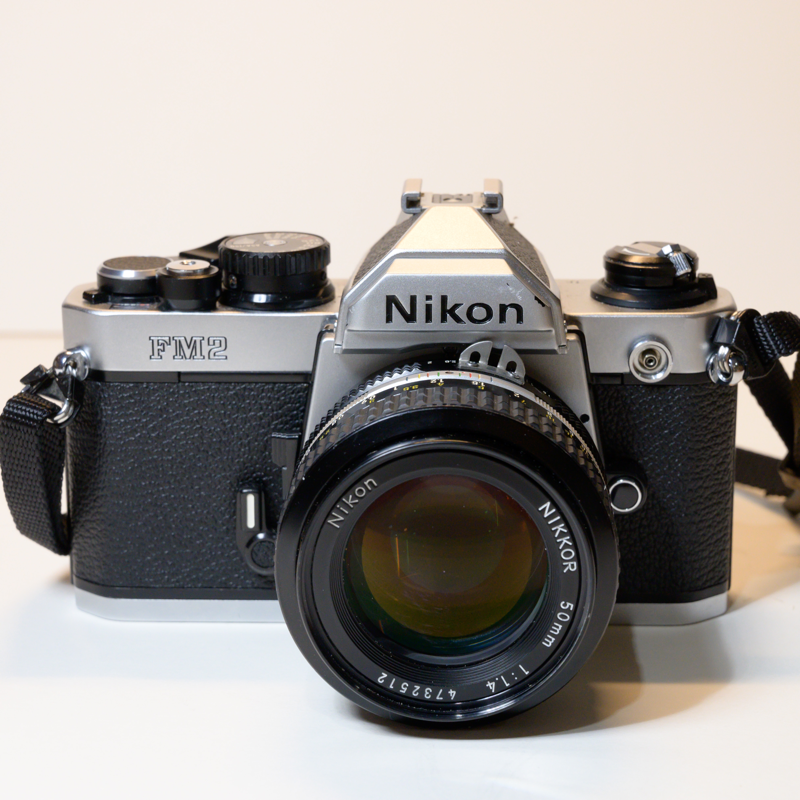
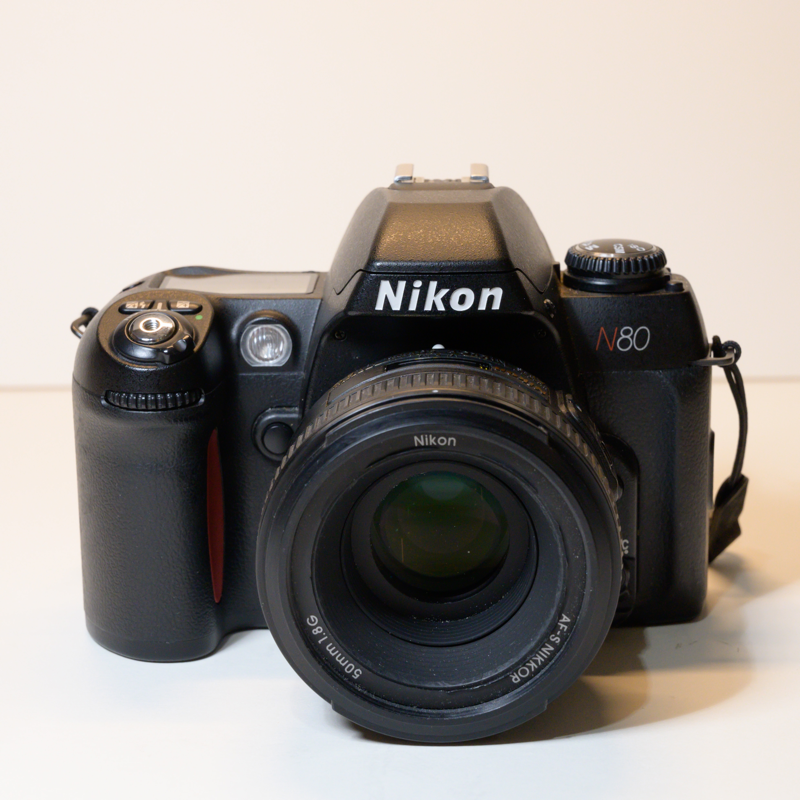
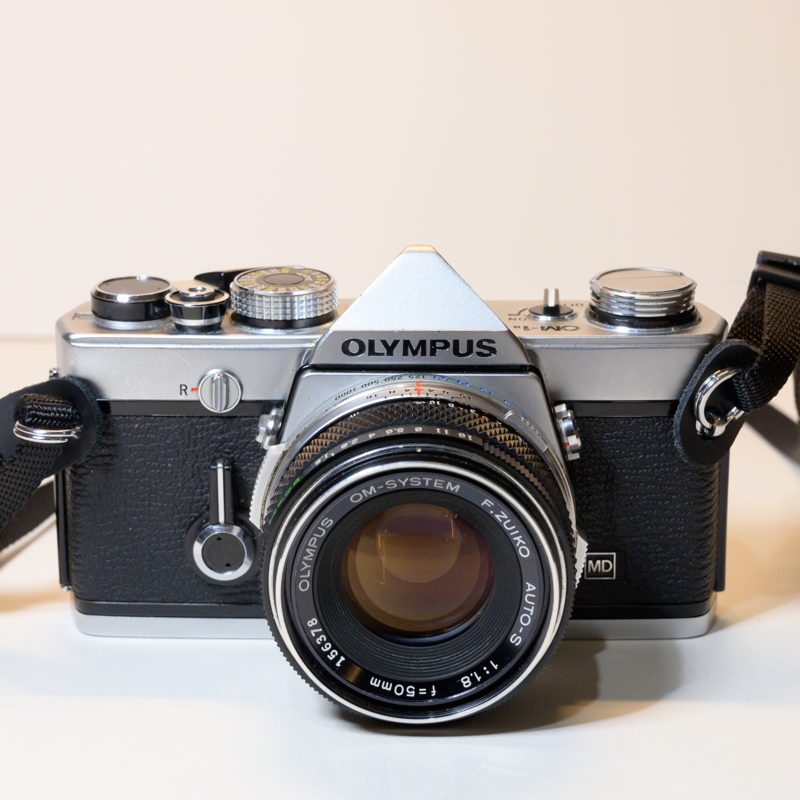
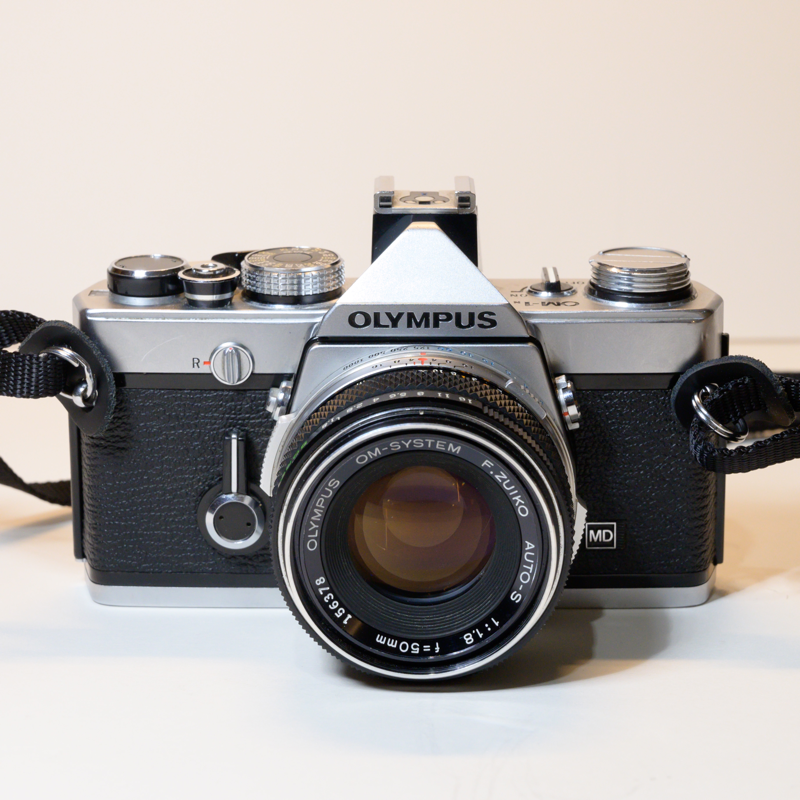
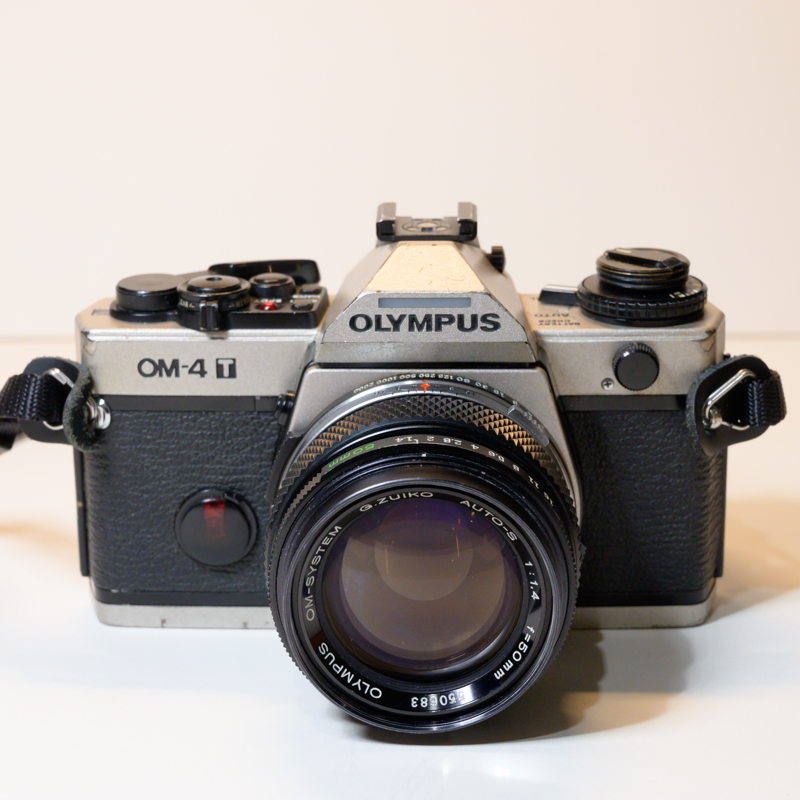
Rolleiflex 2.8c: The Rolleiflex is an iconic film camera…perhaps the iconic film camera. Last year, I was looking to get a medium format camera that didn’t break the bank or my shoulder when carrying it. A twin lens reflex (TLR) like the Rolleiflex seemed to fit the bill. National Camera had one available in decent condition at a fair price, so I bought it. TLRs have a nice compact size and typically come with a fixed lens, so there is no need to invest in an entirely new set of lenses. The Rolleiflex 2.8c is all manual and has no meter. It does provide the ability to focus the lens though. The 2.8c model of the Rolleiflex TLR came out in the mid-1950s. I'm getting more accustomed to shooting with a TLR. The photos this camera produces have a distinct quality to them I quite like. Nikon F Photomic FTn: This camera was gifted to me by my Dad. The Nikon F was a landmark 35mm single lens reflex (SLR) camera system that launched in 1959. Prior to that, rangefinders ruled the market for 35mm cameras. The Nikon F changed all that. The Nikon F is all manual, in that it works without a battery (except the meter). This is a fun camera to shoot...so simple and elegant. My copy of the Nikon F was made in 1972, toward the end of the Nikon F's long production run. Nikkormat FT2: This Nikkormat was also gifted to me by my Dad. Now do you see where I get my Nikon fanboy genes from? Yet another fully manual camera, the Nikkormat FT2 was actually my first Nikon. I used this all throughout the 90s. It still works well. It's built like a tank. The FT2 was made in the mid-70s. Nikon F3 HP: The sexiest camera ever made...that's my claim and you'll never convince me otherwise! My purchase of this camera in 2017 marked the beginning of my return to film. The Nikon F3 was the camera that cemented my return to film. The F3 is one of my absolute favorite cameras. It is incredibly well built and is a delight to shoot. This is definitely geeking out, but the film advance lever on the F3 is a mechanical marvel, and the shutter sound from this camera is pure camera porn. The F3 is an automatic camera, offering aperture preferred metering, which is one of the key reasons I purchased it. I wanted some level of automation when I first returned to film. My copy of the F3 was made in 1981. Nikon FE2: I picked this camera up in 2019 once I was fully committed to film. The FE2 is another automatic camera, but has much lighter weight than the previously listed Nikons. I've got to say that the FE2 has the best viewfinder of any of my film cameras. All the information you need is right there in the viewfinder, and it is nice and big and bright. This camera ranks up there with the F3 as a favorite. My FE2 was made somewhere in the 1983 - 1987 time period. Nikon FM2n: This is the latest addition to my camera collection, serving to replace a recently sold Nikon F2. The FM2n is another manual camera that will function perfectly well without a battery. It does have a meter though, with a readout in the viewfinder that is simply wonderful...so easy to use. I'm really enjoying shooting the FM2n. I had held out for a long time on buying this camera, since it is priced a bit higher on the used market, but once I sold my F2, another manual camera, I wanted to replace it with a manual Nikon camera that I'd enjoy shooting. In terms of how it feels in the hands, it's much like the FE2. Both are light and compact, and are easy to carry on long hikes. Surprisingly for its styling and features, my copy of the FM2n was made in around 2001. Nikon N80: This was the first Nikon camera I actually bought new with my own money back in 2002. This was at the tail end of the film era and the beginning of digital overtaking film. This is the only film camera I own that has auto focus. One nice thing about it is that I can use all my Nikon DSLR lenses on it. Olympus OM-1n: The Olympus OM-1 was another breakthrough 35mm SLR, representing a dramatic downsizing of the traditional bulky 35mm SLR. The OM-1n is an upgrade to the OM-1 that came out in 1979. Like the OM-1, it is a fully manual camera that is beautifully built. It is a delight to shoot, so simple and intuitive. All the OM cameras have amazing viewfinders...among the biggest and brightest out there. I picked up my first OM-1n with the objective of adding a fully manual Olympus OM camera to my collection. I purchased my second OM-1n because I just couldn't stand to see it sitting there listed at a bargain price of seventy bucks at National Camera. I tried to interest others in buying it in the online film community at Twitter, and when that didn't work, I just couldn't let this deal pass me by. I sold a Nikon F2 to make room for this camera in my collection. Olympus OM-2n: When I was looking to buy my first 35mm SLR back in the 1970s, what I really wanted was the Olympus OM-2, but I couldn't afford one with the money I'd saved working at the lumberyard. The OM-2n was an upgrade to the OM-2 that came out in 1979. This particular camera is my first Olympus. I picked it up in 2020 at KEH. Built just like the OM-1n, it is an automatic camera that offers aperture-preferred metering. Like the OM-1n, this camera is wonderful to shoot. It ranks up there with my F3 and FE2 as one of my favorite cameras. Olympus OM-4T: The OM-4T represents the pinnacle of Olympus' achievements in 35mm SLRs. That is what served as my impetus to get an OM-4T, to have the best that Olympus had to offer in the OM line. The problem was that the OM-4T carries a hefty premium on the used market. I was able to find an OM-4T in "shooter condition" at KEH at a reasonable price. I sold an Olympus OM-2S to make room for this camera. The OM-4T has a sophisticated spot metering capability that I'm just beginning to get my arms wrapped around. The OM-4 and OM-4T had a long production run, ranging from 1987 to 2002. I don't know when mine was made during that time period. Interestingly enough, I'm poised to lead another film photography workshop with the high schoolers at our church during Arts Month in March. I'm hoping it all goes ahead. The youth will be using my 35mm SLRs for this workshop and we'll be shooting HP5+ black & white film from Ilford. It should be fun. I'll write about it here.
7 Comments
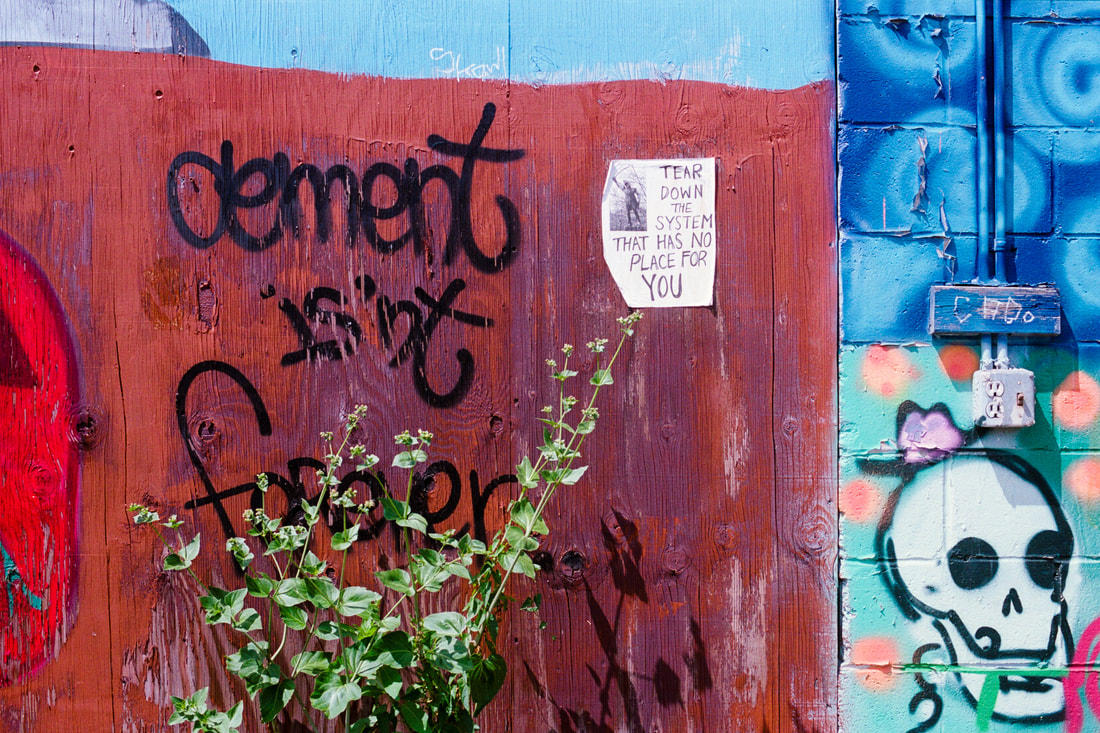
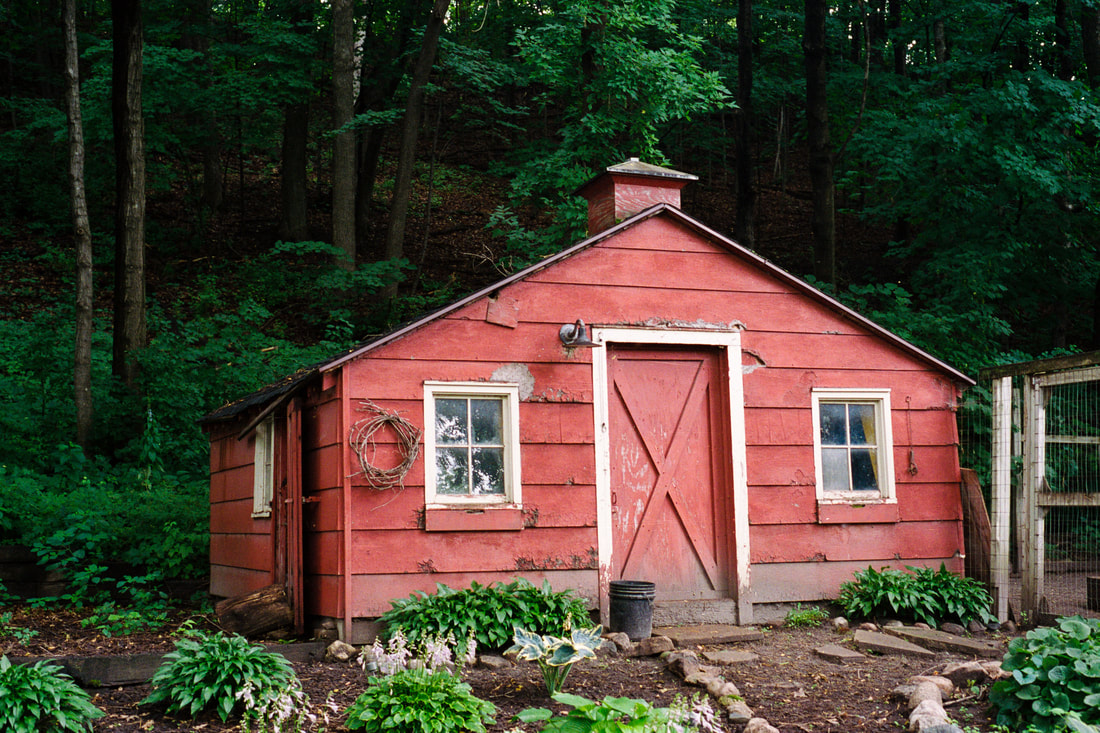
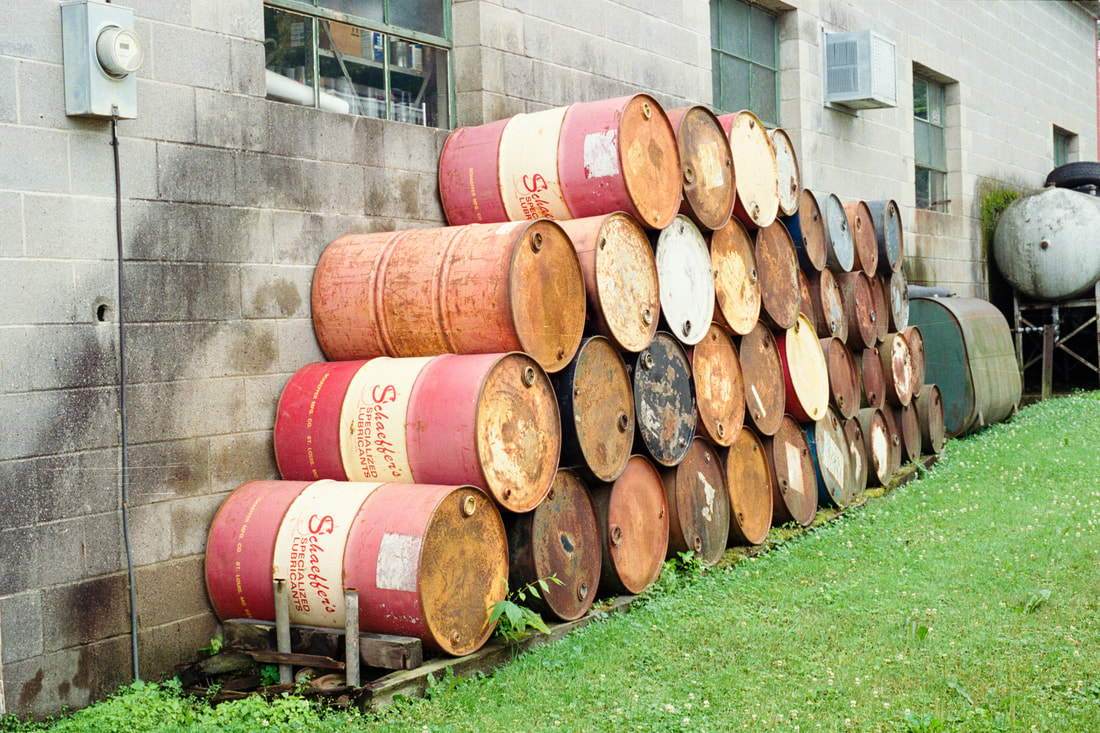
 During COVID, getting out for long walks with a film camera in hand has been my way of refreshing my body and mind. Most times I walk the trails in our neighborhood. Sometimes I walk in the woods. Other times I walk in Minneapolis. And on the coldest of days, I walk the mall. Wherever I'm walking, I have my camera in hand. The images I make on my walks reflect a circumscribed life...the constrained lives we've all experienced during COVID. Film photography is my photographic journal. As this body of work has grown and evolved, I get a sense that these are lonely images. There is only one person in all these photographs...a solitary photographer out walking. When I make a photograph, more than anything I'm hoping it evokes an emotion...any emotion. It's not that I'm seeking the emotion I was feeling at the time I made the photograph. Those are mine. I'm hoping they evoke an emotional response in the viewer. I've told you what emotion I sense in these photographs. I'd love to read what emotions you sense when viewing these photographs in the comments below. 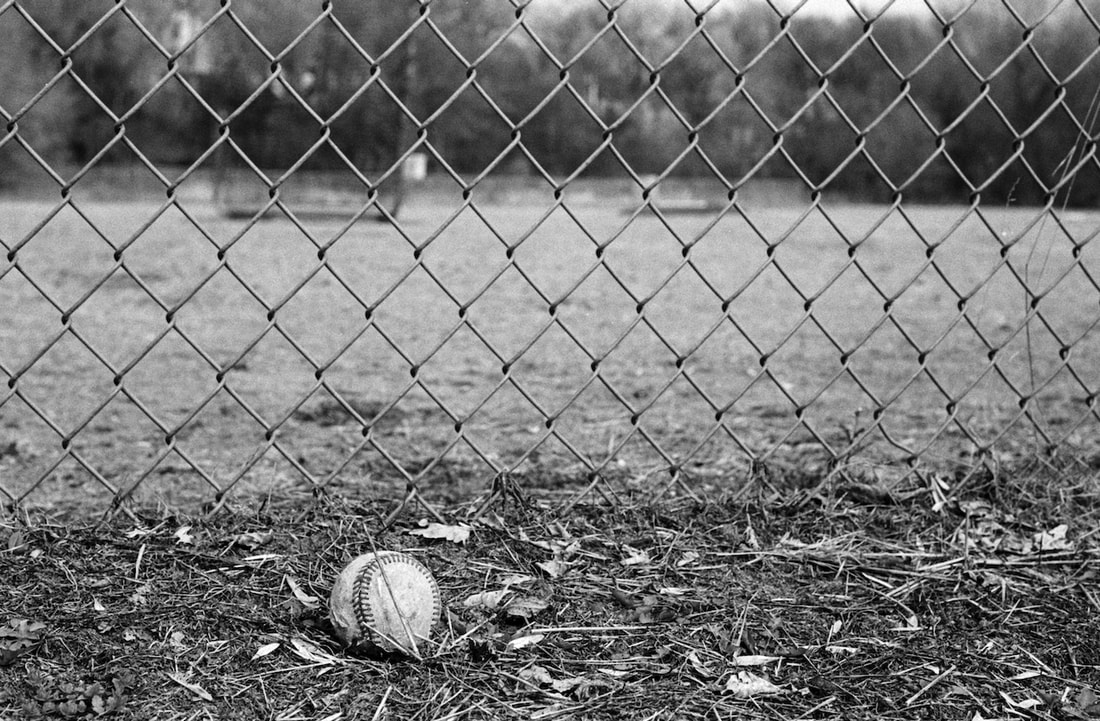 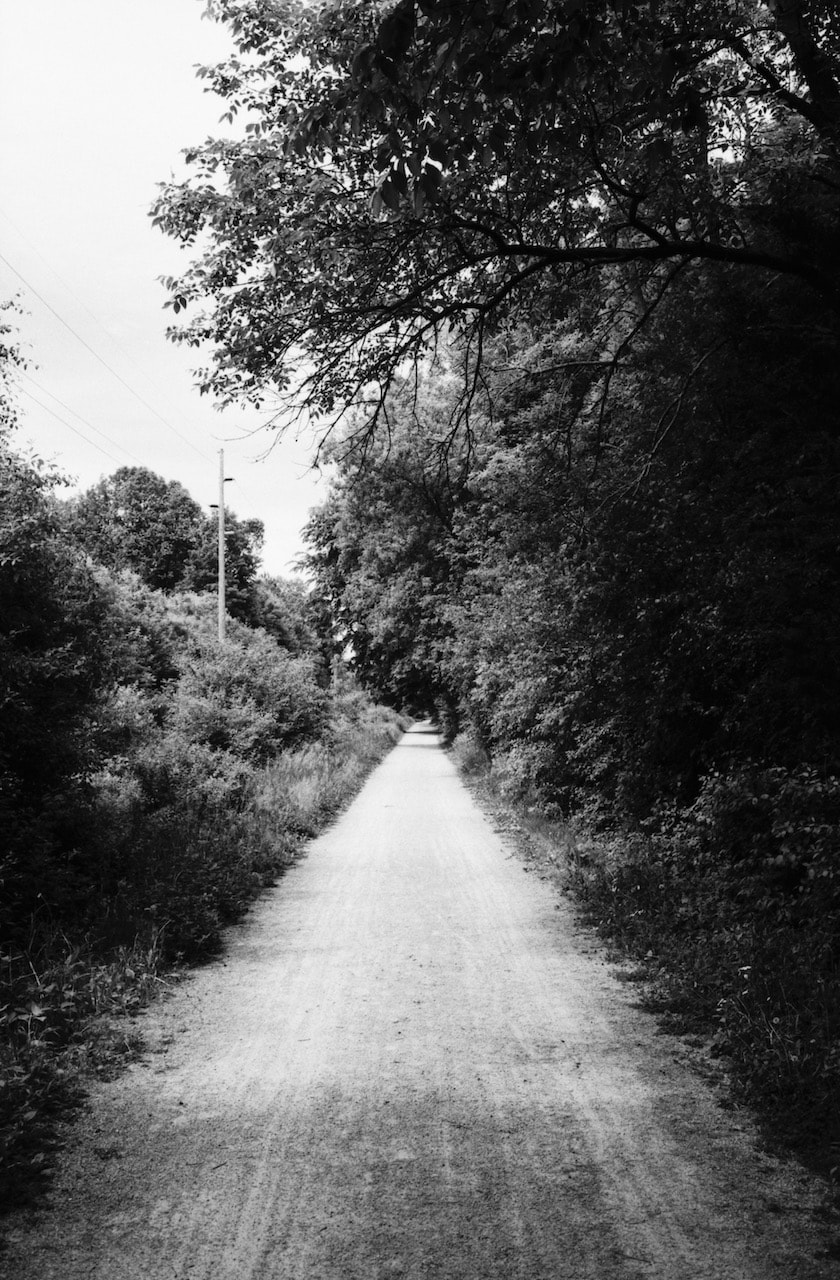 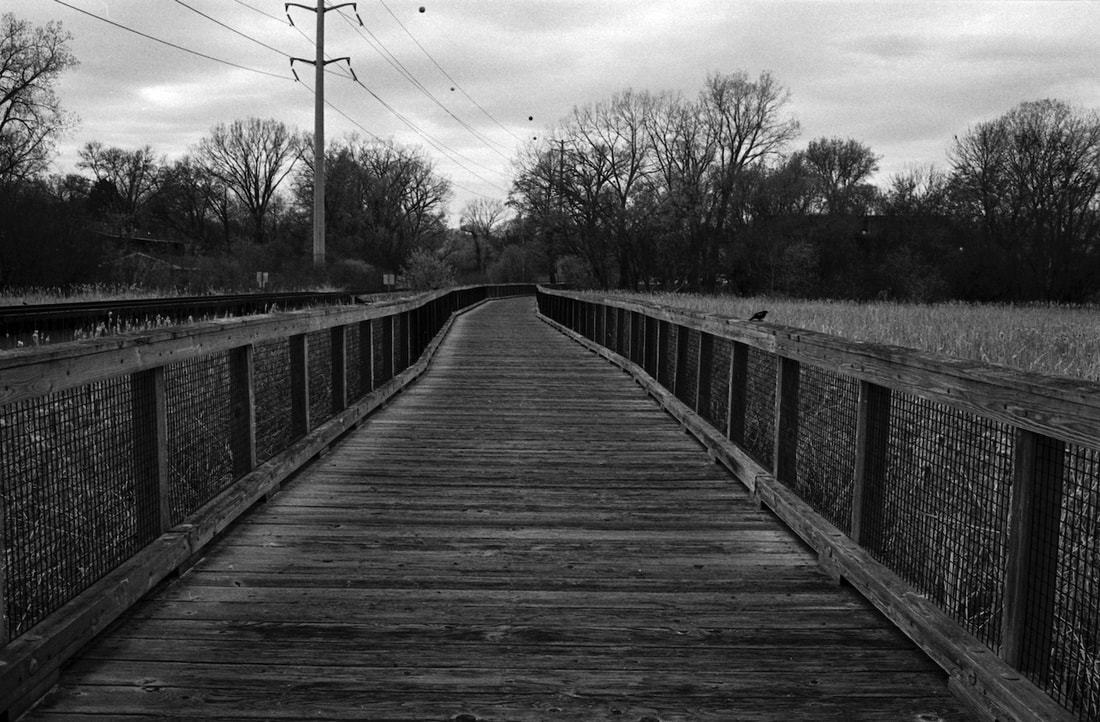 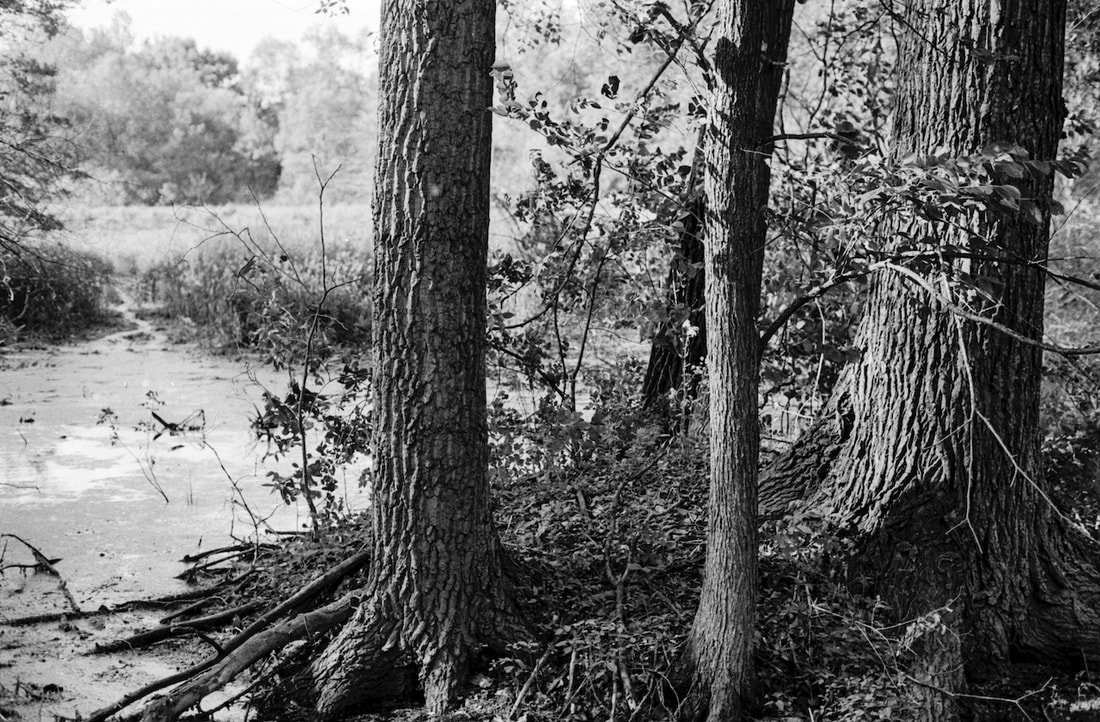 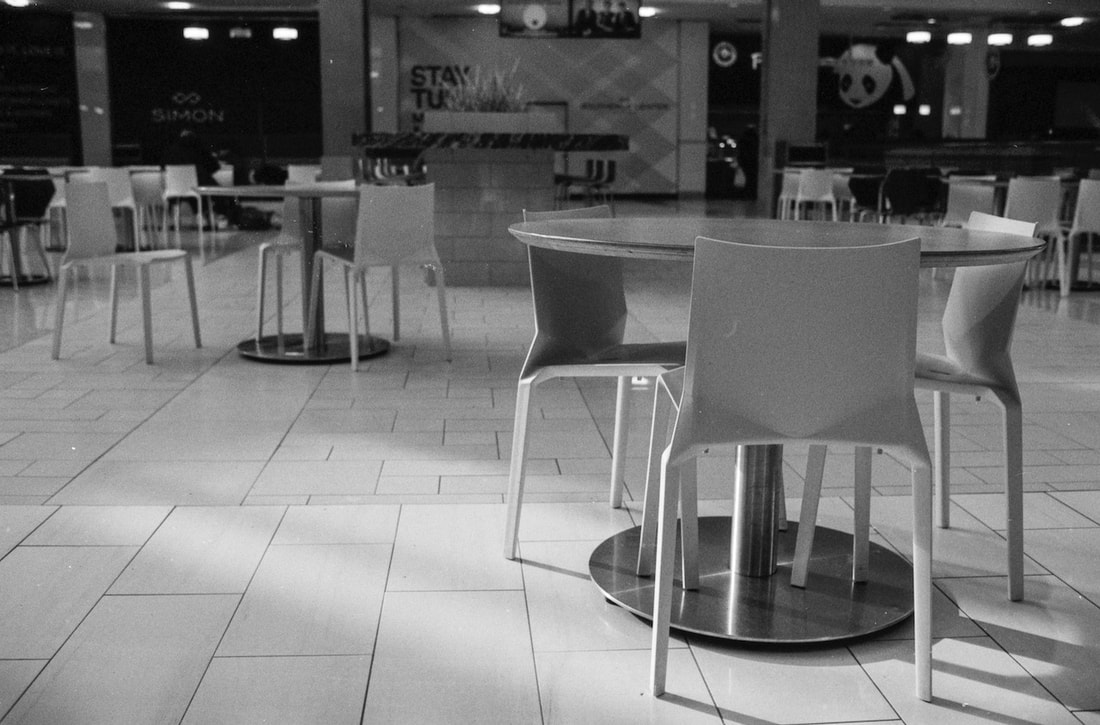 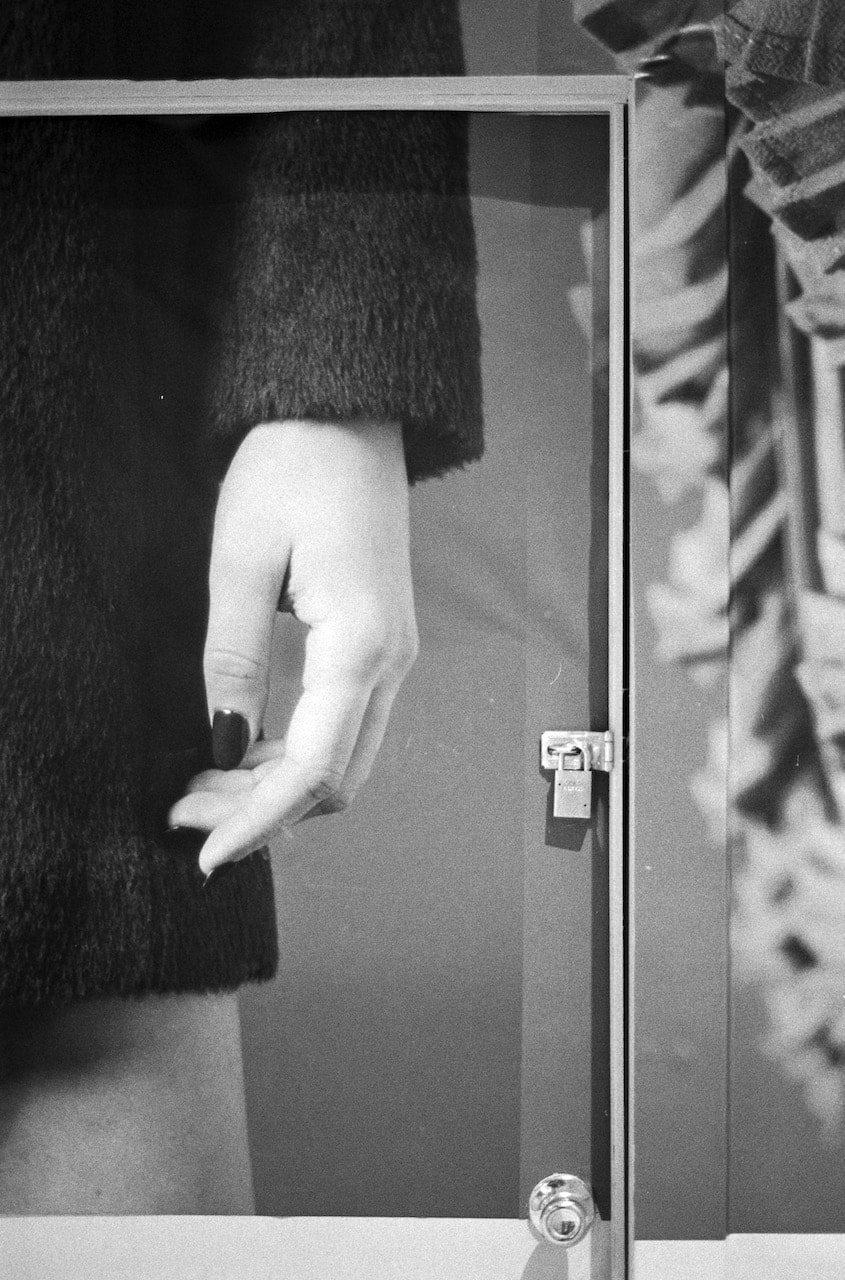 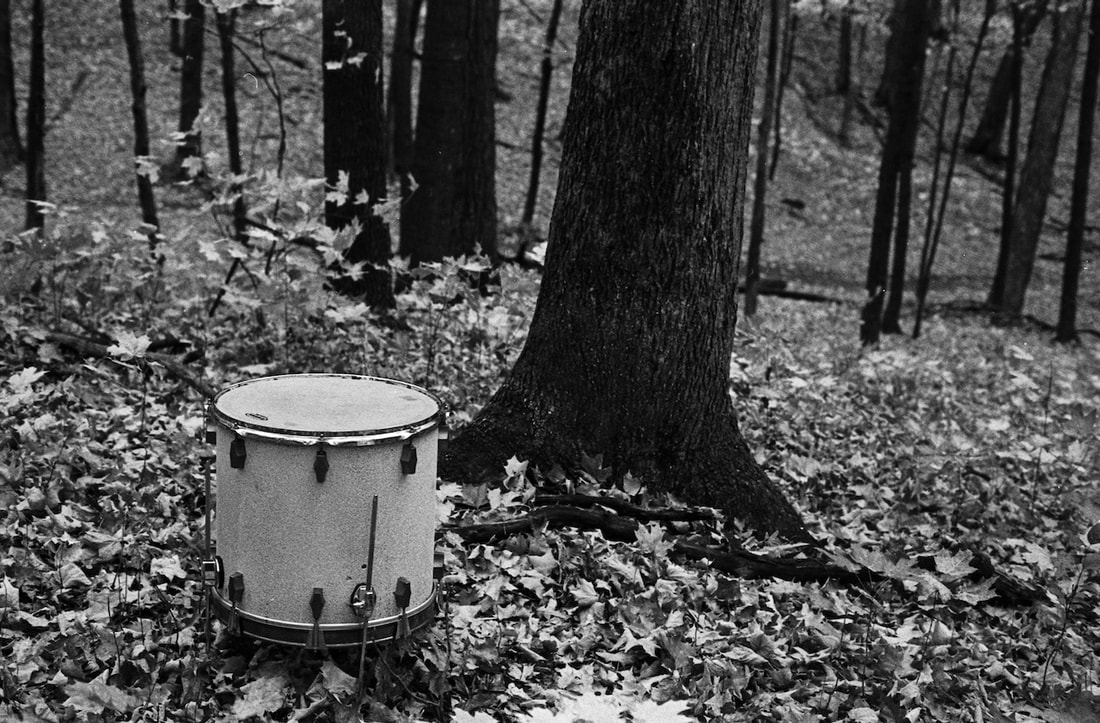 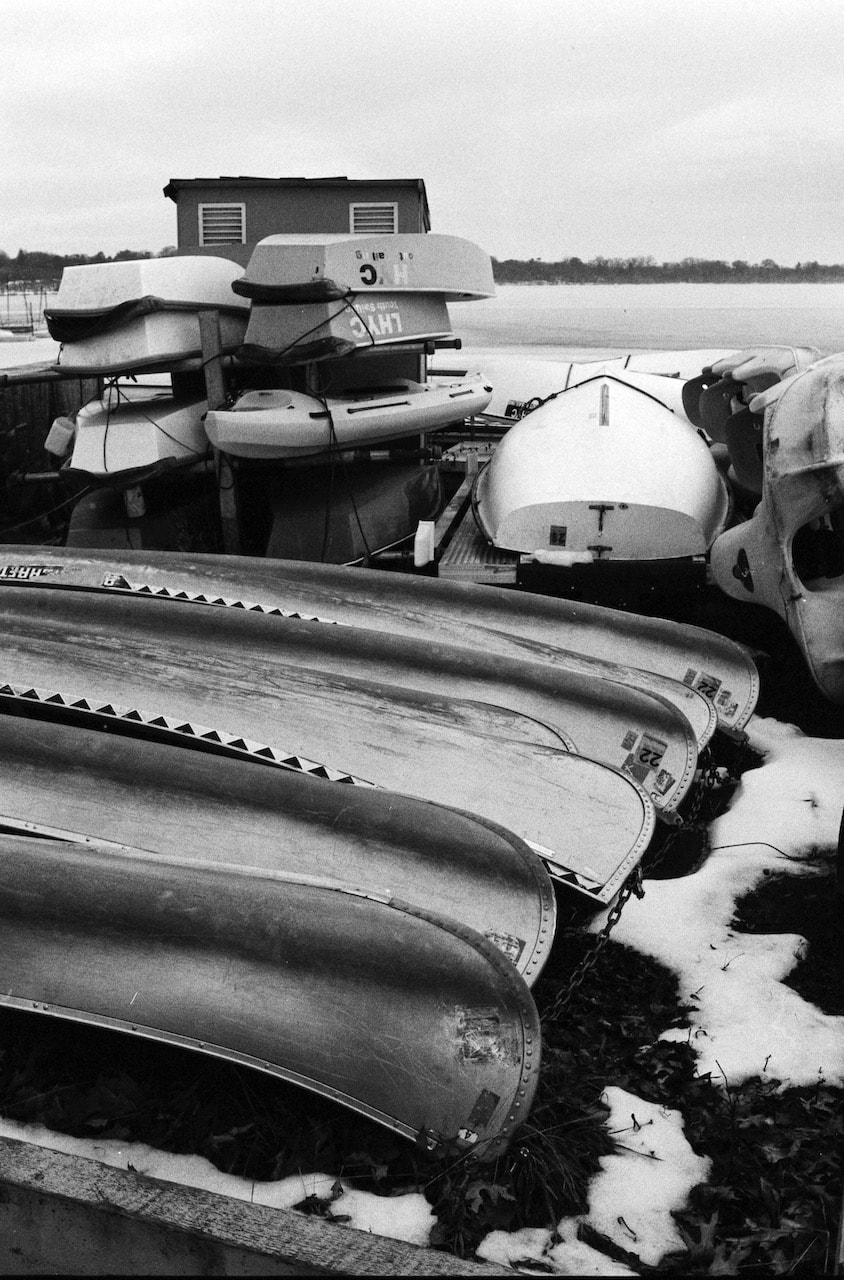 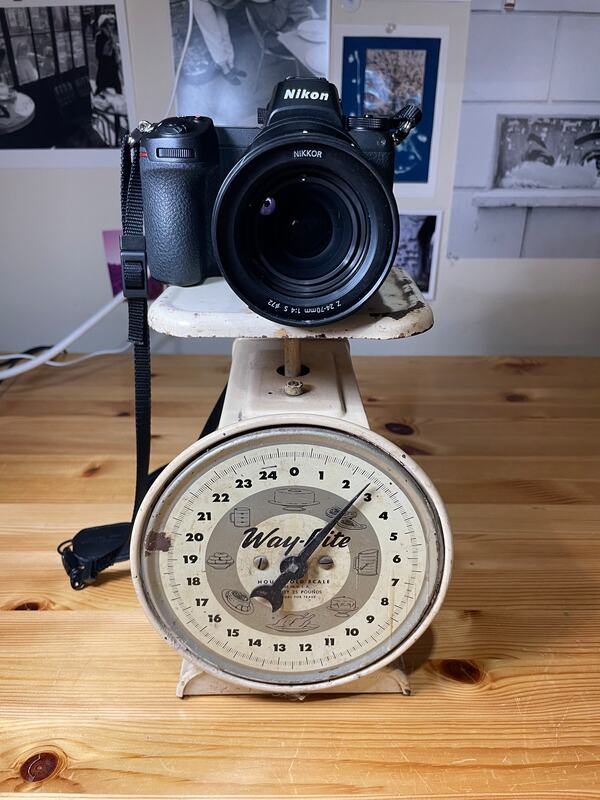 As most of you know, photography is my thing. I've been into photography since fifth grade, so that adds up to over 50 years of making photographs. I agonize over what camera gear to bring more than any other packing decision I have to make. In 2019, the last time we went to Paris, I brought just over nine pounds of photo gear...one DSLR and two film cameras along with four lenses. While I certainly didn't carry all that gear with me on the streets of Paris, I did have to schlep it there and back on the airplane. I'm cutting that weight in about half this time, only bringing my Nikon Z6 mirrorless digital camera and three lenses. That's right, no film cameras this time. 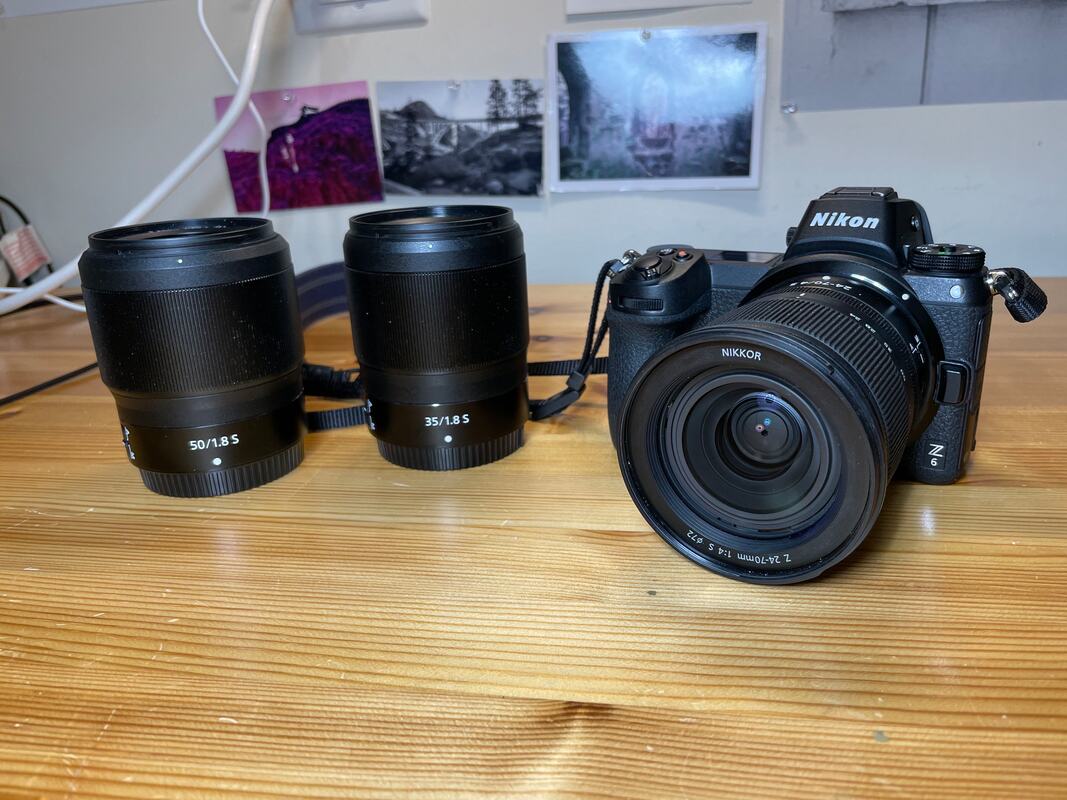 My 2021 Paris Camera Kit Since early 2019, I've been shooting film almost entirely for my personal work. I've been developing my own film at home, and as of this year, I've also been printing in my own darkroom. It's a fair question to ask why I'm not bringing film cameras to Paris this time. Well, here is my answer to that question. A large part of the enjoyment I get from shooting film is doing my own processing, scanning, and printing. I can't realistically do any of that when we're in Paris. Plus, with more cameras and formats comes more decisions. Which camera do I bring today? What film should I shoot today, black and white or color? Do I shoot digital or film today? While I enjoyed shooting film in Paris in 2019, it did come with a certain amount of handwringing. I plan to avoid that angst this time. 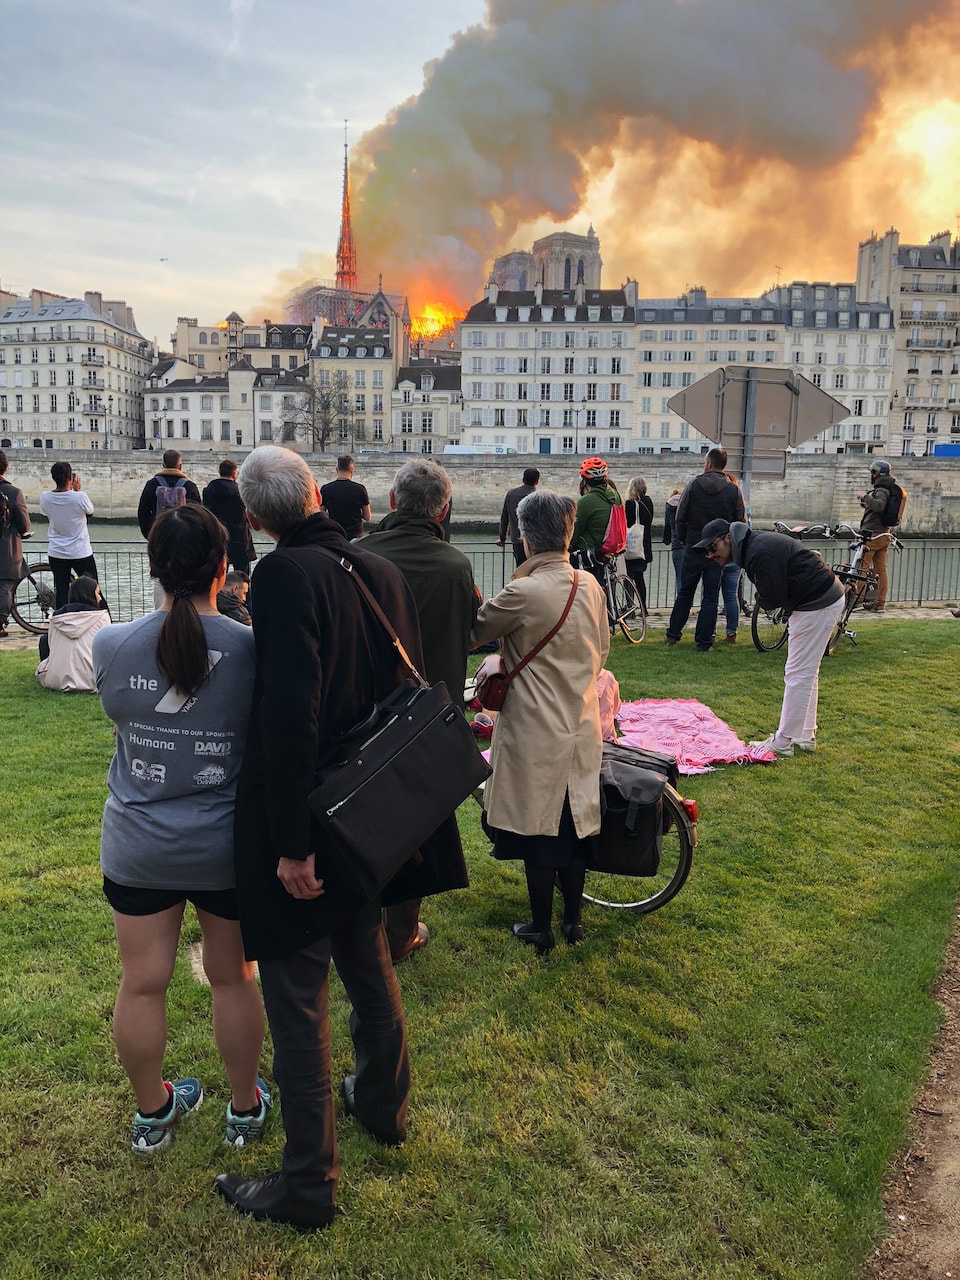 Notre Dame Fire: iPhone X Case in point. When I happened upon the scene of the Notre Dame fire in 2019, the only dedicated camera I had with me was an Olympus film camera loaded with black and white film and fitted with a moderately wide angle 35mm lens. The only digital camera I had on me was my iPhone X. The images I captured that day that ended up in the Minneapolis Star Tribune newspaper were captured on my iPhone X. I didn't get my film back from processing for a number of days. I do wish I had taken my Nikon digital camera with me that day when I set out for a short walk down to the Seine before dinner. As it was, I ran out of film and my iPhone battery ran quite low, forcing me to ration my shots. 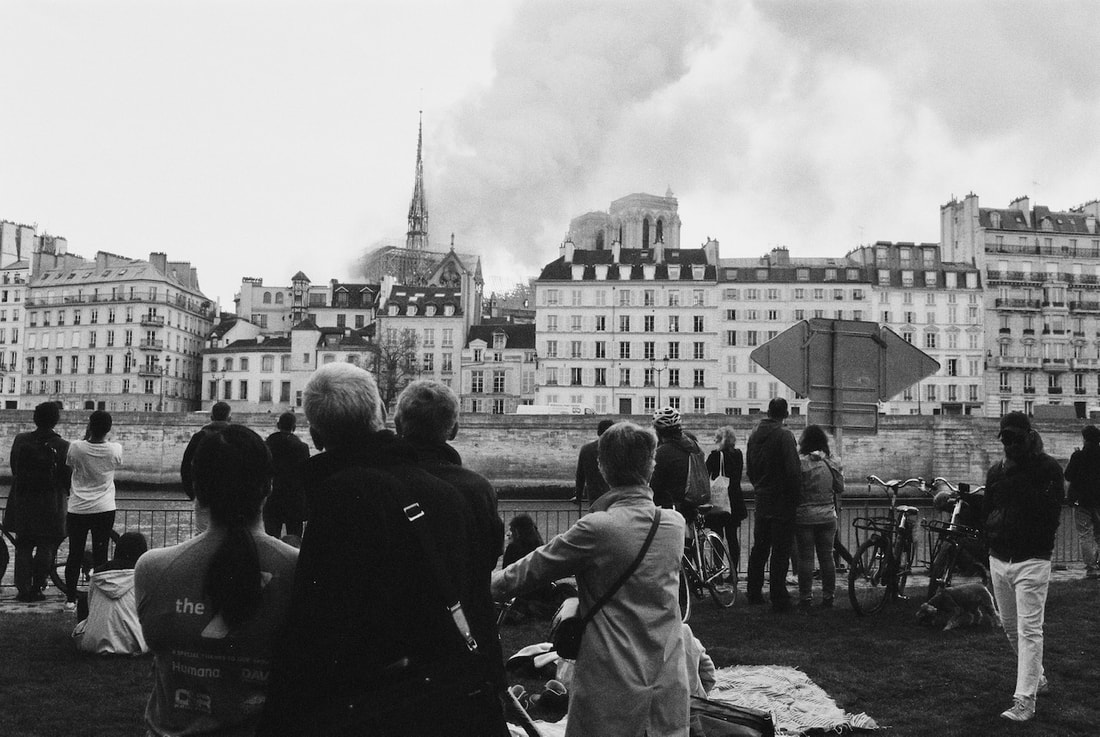 Notre Dame Fire: Olympus OM-2S with Kodak Tri-X film It's true that many of my favorite photographs from our 2019 trip to Paris were made on film. While I know that part of that is the unique way that film renders an image, I also know that in large measure it was due to the fact that when I was simply walking around with no special destination in mind, I took a film camera with me. Those images of everyday life in Paris are the ones that are most evocative for me. I'm hoping that those everyday scenes captured on my digital Nikon Z6 will be every bit as evocative. As readers of this blog, you will get to judge for yourselves.
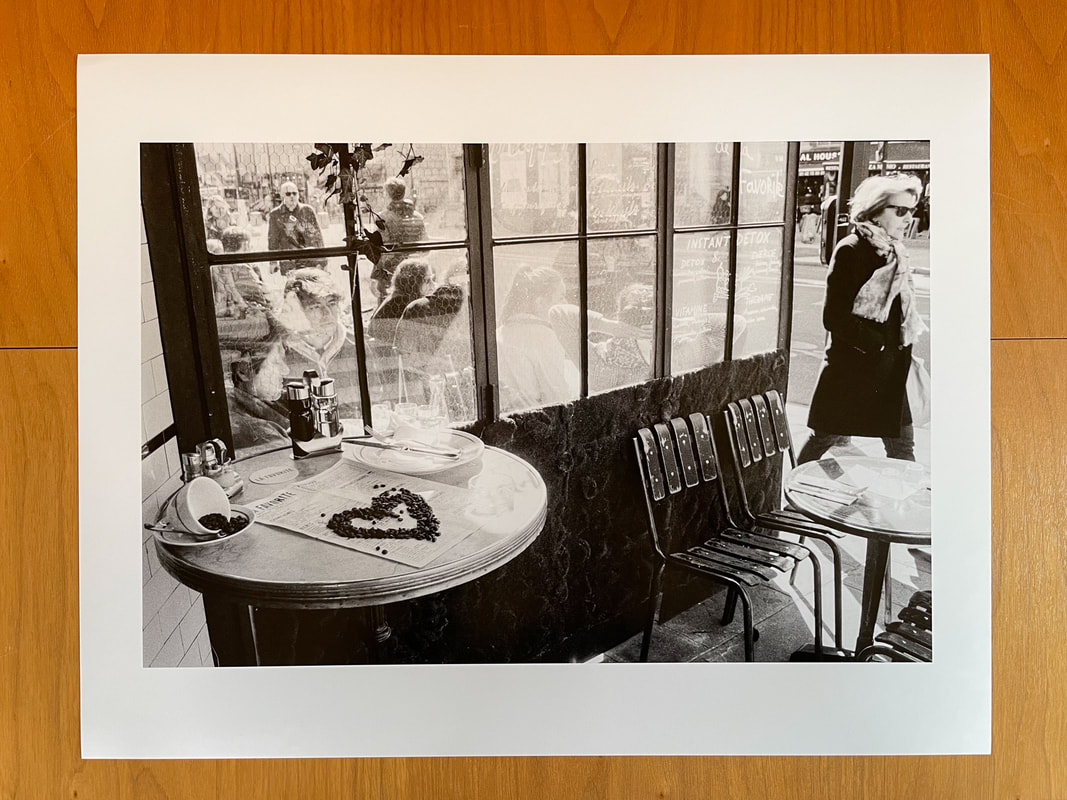 Paris Cafe: 13" x 19" print from a 35mm Kodak Tri-X negative One of the commonly mentioned dings against 35mm is that you can't or shouldn't attempt to make large prints with it. Well, I'm hoping to debunk that myth in this blog post. What I will provide for you is my workflow from beginning to end for getting beautiful, 13" x 19" archival inkjet black & white prints from 35mm negatives. First, a list of the gear and software I will use along the way. Equipment/Software:
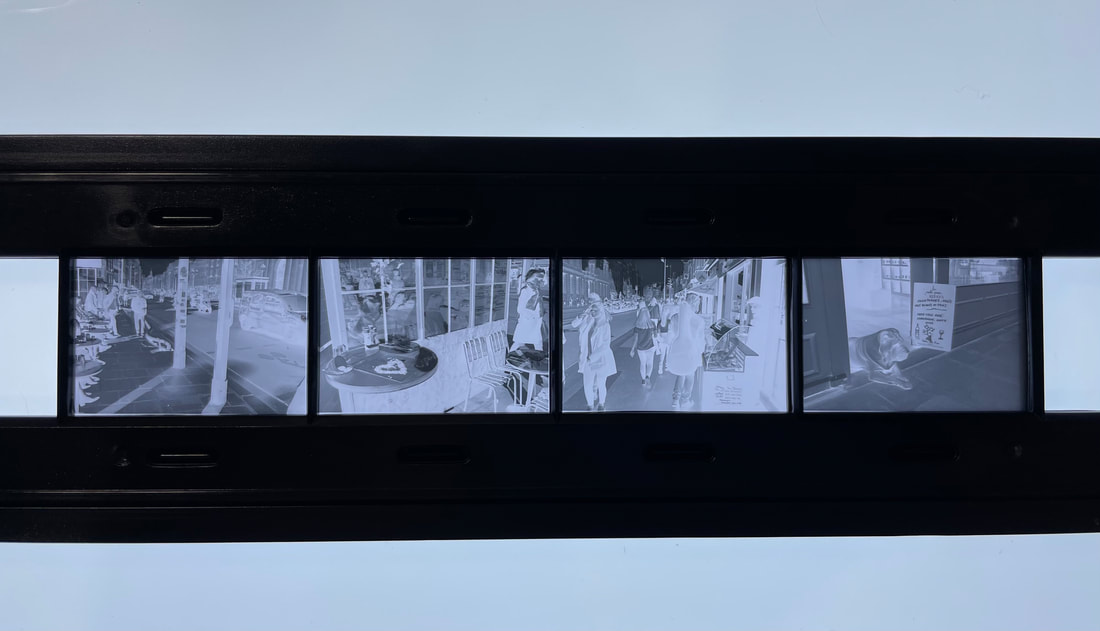 Workflow Steps: The first step is to place the negative in the scanning tray and get it cleaned. I find it helps me to see the borders clearly by putting the tray and negative on an LED light table (these are super affordable). Once I get the negative placed and locked in, I give it a good blowing with a Rocket Blower front and back. 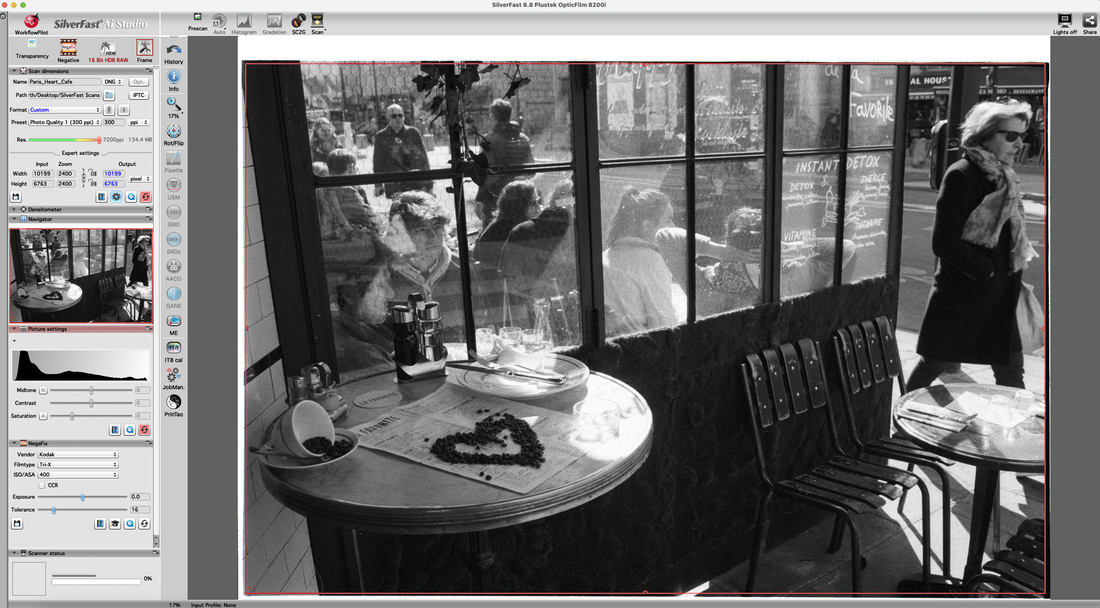 Next I'll walk through the settings in SilverFast. The first thing I do when I open SilverFast is conduct a Prescan. Once I have that, I make sure that the red selection box is sized properly. All of the settings are shown on the left panel. I won't go over all of those, but a couple are of special importance. First, I select 16 Bit HDR RAW for my scan type. I only use this scan type when I'm planning on making a large print. This will create a digital negative of the image. I select DNG for file type. You could probably use TIFF as well. This next setting is the one where I go outside accepted bounds. I set the scan resolution to the greatest allowed by the 8200i, which is 7200 ppi. Reviews will tell you that the effective resolution of this scanner is closer to half that, so the argument is that you shouldn't scan at a resolution greater than 3600 ppi because all you're getting is a bigger file with no more detail. I've tried up-sizing files scanned at 3600 ppi to the print size needed, and the results aren't nearly as good. What I found is that the shadows get super dirty, for lack of a better term. So believe me, while you are not gaining effective resolution scanning at 7200, you are getting a cleaner file to work with downstream. I use SilverFast's NegaFix option on all my scans. I find it does a fabulous job rendering the negatives. I don't use any of the auto color correction options. Once I've named my file and told SilverFast where to store it I hit the Scan button and let the Plustek do its thing. 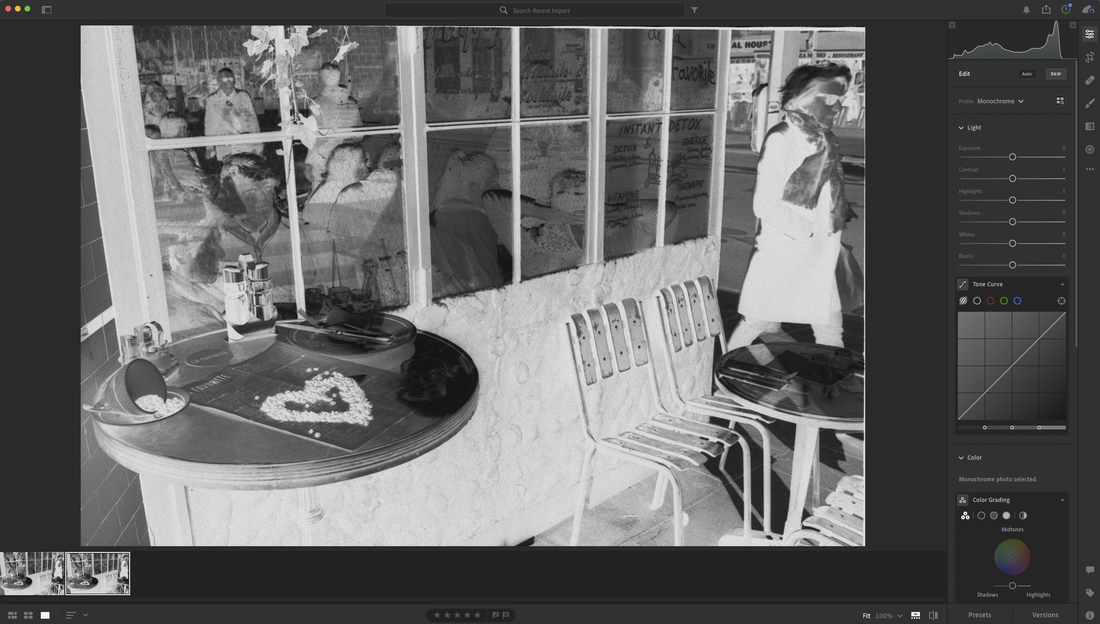 Once you import the file into Lightroom (I'm using CC) you will see a digital negative on the screen. At this point I don't do anything with the image other than choose Edit in Photoshop. 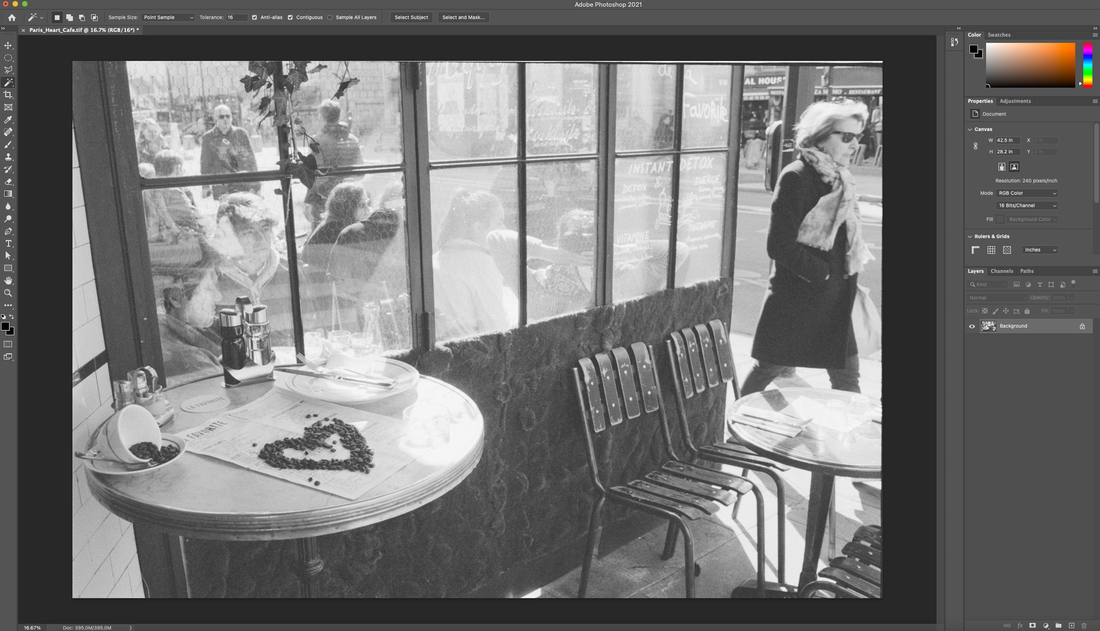 When the file opens in Photoshop it will still look like a negative. At this point I use Photoshop for just two processes. First I choose Image>>Adjustments>>Invert. Now the image looks like an extremely flat positive. Don't worry about that. We'll fix that in Lightroom. The next step I do in Photoshop is to resize the image by choosing Image>>Image Size and then make the settings shown below.  To get a 13" x 19" print at 360 ppi, which is optimal for my Epson, I need to downsize the file to 6840 pixels on the long side. For the resampling choice, I use Bicubic Sharper (reduction). To be honest, I haven't tried the other options. This one just works for me. Once I execute the image size command I'm all done with Photoshop. I save the file in Photoshop and then quit Photoshop to go back to Lightroom. 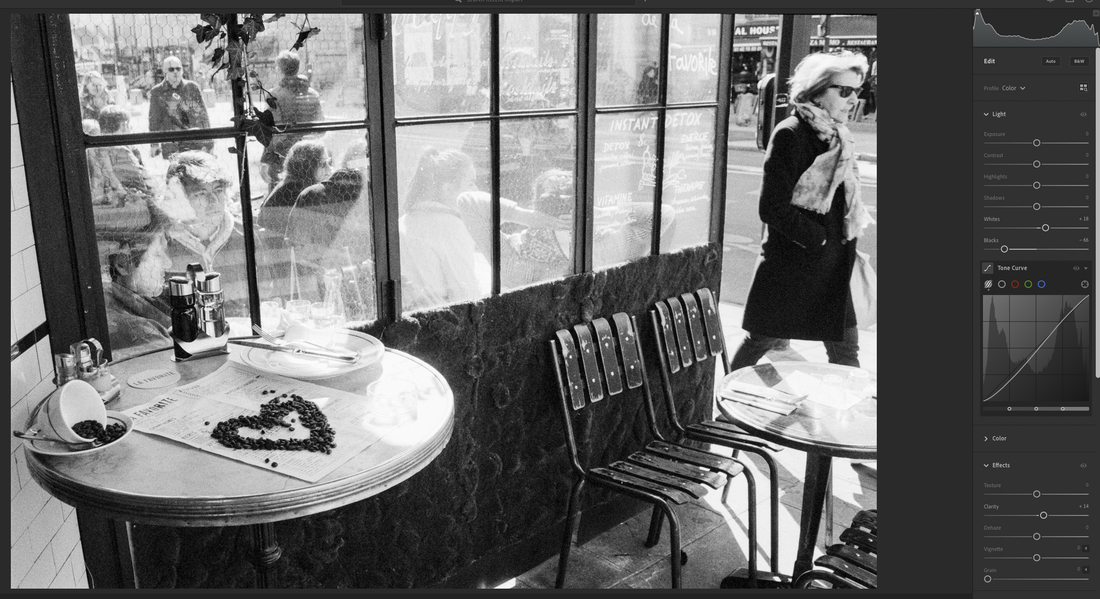 Now I am back in Lightroom, and here is where we start to bring the image to life. The first thing I do is set the white and black points to taste. This alone makes a huge difference in the tonalities. Next I adjust the tone curve. I added a bit of an S-curve to this image. I also added a bit of Clarity.  Finally, I set sharpening to the Lightroom default level of 40. Other than some minor use of the healing brush, this image is ready to print. Because I'm using Lightroom CC, and because Adobe for some unknown reason didn't think printing was important enough to include in CC yet, I have to go back into Photoshop to print. Annoying, yes, but it is doable. 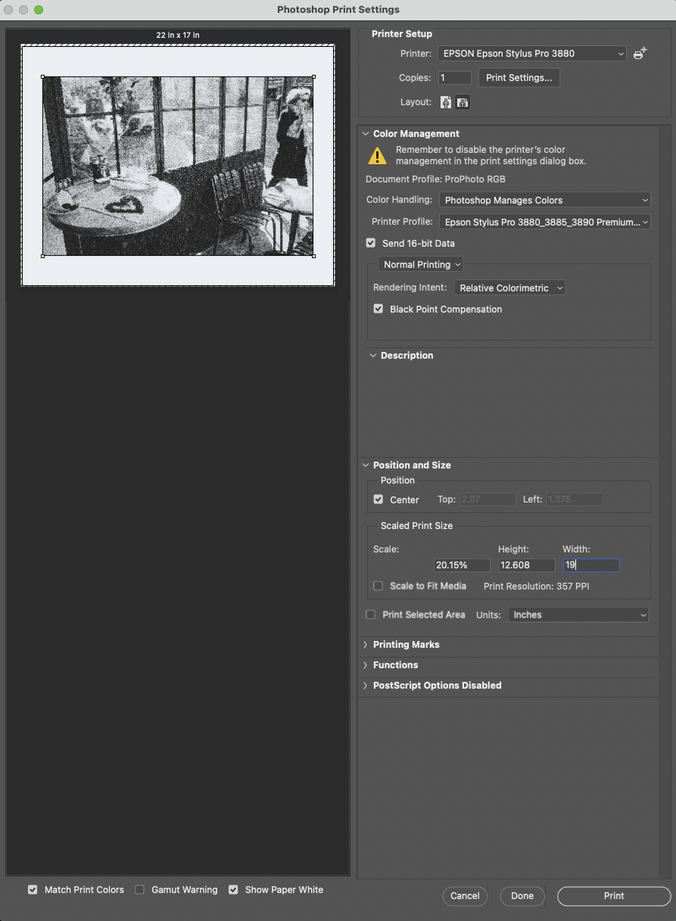 Now I am back in Photoshop in the Print dialog. The settings here are super critical. Besides selecting my printer, I tell Photoshop that it should manage colors and I select the proper icc printer profile. I select 16-bit data and black-point compensation. In the Layout section I choose landscape orientation. Down in the Position and Size section I input the width and let Photoshop auto calculate everything else. You'll see that the image isn't exactly 360 ppi because I did a wee bit of a crop. I'm not going to worry about that. In Rendering Intent, I've found Relative Colorimetric to be my preferred method, so I just leave it at that. I doubt that has much impact on a black and white image anyway. And then all that's left is to hit the Print button. I've shown the resulting print at the beginning of the blog post, so I won't repeat that here, but what I will do is include a slideshow of a series of closeup photos from the print made on my iPhone 12 Pro. Now I'll be the first to admit that I am not a pixel peeper. When I'm making a large print, I keep in mind the typical viewing distance. To be honest, I could probably be printing at a resolution much lower than 360 ppi for such a large print as 13" x 19", but 360 ppi is what makes my Epson happiest, so that's what I stick with. Certainly looked at close up you're going to see the film grain, especially on a 400 speed classic grain film like Tri-X. But frankly, I like grain. Maybe not big chunks of it, but salt and peppery grain I'm more than happy with. And that's the way the grain looks to me on this print.
A caveat...the scanner is the critical element of this workflow. I don't think you'd get nearly as good of results with a flatbed scanner. This is where a dedicated film scanner really comes in handy. The Plustek film scanners are a terrific value and a great choice if you're looking for a dedicated 35mm film scanner. I hope this has been helpful. As always, if you've got a question just send me a note or post a comment. 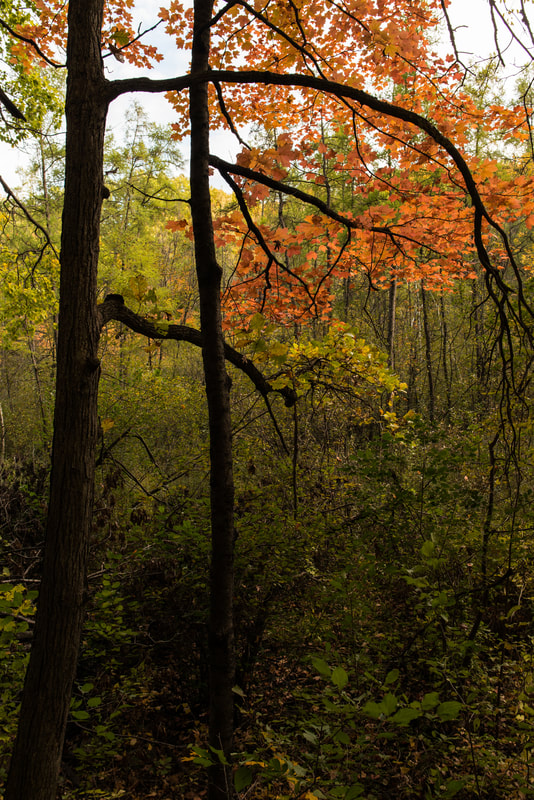 Six years ago I made one of my favorite photos in the Big Woods at Wood-Rill Scientific and Natural Area. The colors and draping of the branches caught my eye. My recollection is that it was a wettish day when I made this photo back in October of 2014. I've been back to Wood-Rill more times than I can count since that day in early October 2014. I've often tried to find these trees to make a new image, but I'll be darned if I could find them. I traipsed all over the edge of that tamarack bog trying to find them, but I always struck out. That is until this year. Priscilla and I went out to Wood-Rill for a late afternoon hike recently and I had my Olympus OM-2n with me loaded with Ilford HP5+ black & white film, rated at an ISO of 400. As I was rooting around at the edge of the bog, all of a sudden these trees presented themselves right in front of me. I couldn't believe it. Wouldn't you know the one time when I wasn't looking for them at all, there they'd be, right in front of me. 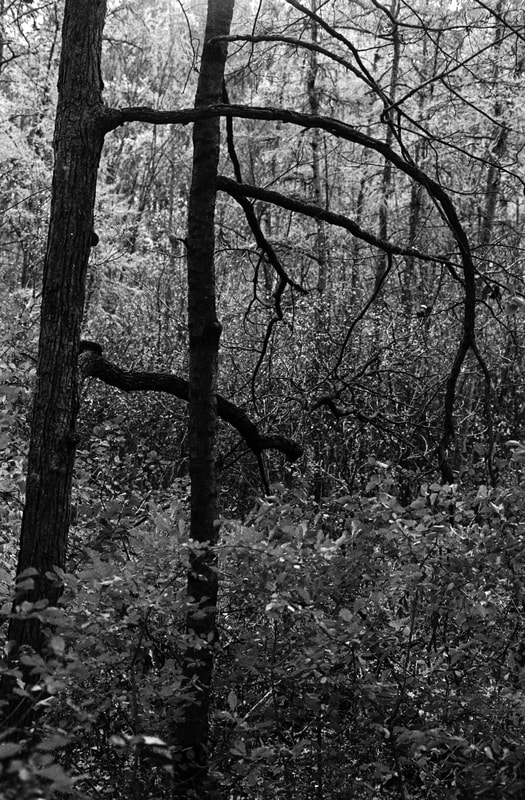 Because I was shooting with a 50mm lens this time rather than the 28mm lens I was using back in 2014, the perspective in these two photos is different, but they are unmistakably the same trees, with pretty much the same composition. I actually think I prefer the perspective in the black & white shot over the color shot. Losing the sky at the top tightens things up a bit in my estimation. Neither of these photos has been cropped. They are as shot. One thing I love about the black & white version is how the tamarack trees in the background seem to light up.
I think now that I've made it back to the same spot a second time, I'll be able to find it again. There are a few scenes out at Wood-Rill that I like making photographs of at different times of the year. I'll be adding these trees to my revisit list. 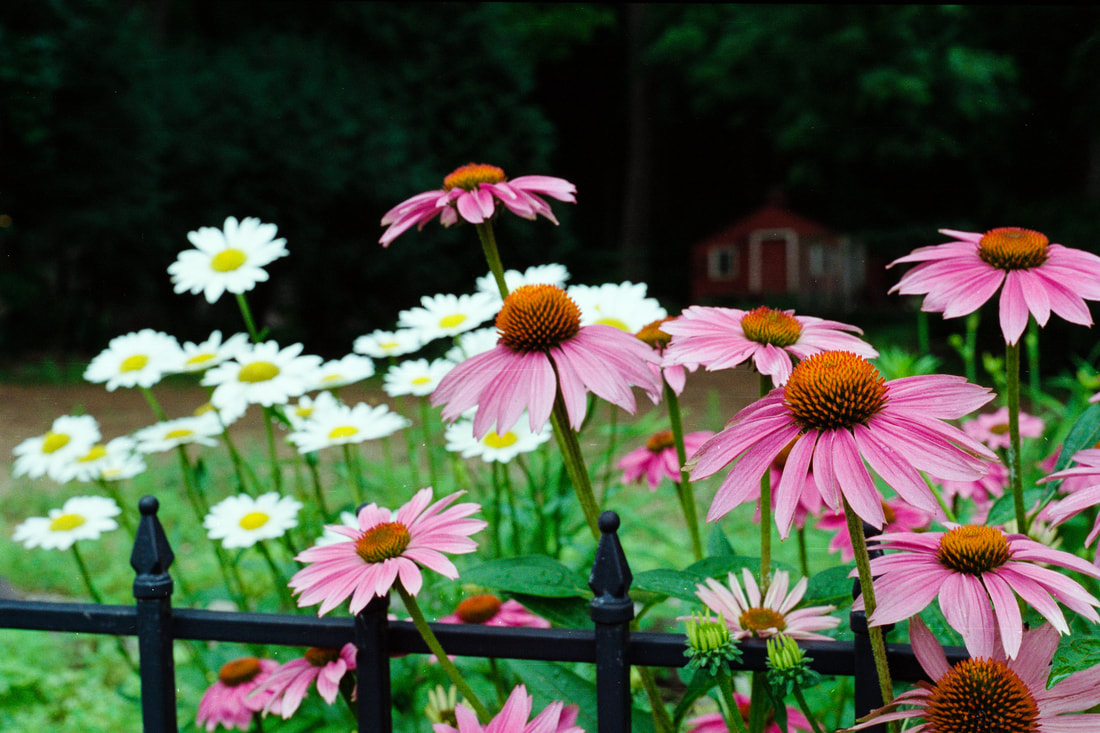 Hen House Cone Flowers: Portra 400 Since coming back to film photography a year and a half ago, my color film of choice has been Kodak Portra 400. Recently I decided to test out a few other Kodak color film stocks to see what I've been missing. The films I tried out alongside Portra 400 are Portra 160, Ektar 100, and ProImage 100. Portra and Ektar are the premium priced films in this bunch. Kodak ProImage 100 is substantially less expensive, so I was curious to see how it would fair against the others. I love Portra 400's understated saturation and warm tones. It just sees the world the way I do. I expected a similar look and feel with Portra 160, and that's what I got. Ektar is supposedly the closest you can get to Kodachrome colors these days. It certainly had punchier reds. I actually preferred the warmer color palette of ProImage 100 to Ektar. I certainly like the fact that it's way less expensive too. I shot these four rolls during July, using my Nikon F3HP and Nikon FE2, both fitted with 50mm prime lenses. All four rolls were processed at West Photo in Minneapolis. The images in the gallery above were scanned on my Plustek OpticFilm 8200i using SilverFast software, with the resolution set to 3600 dpi. I selected the Negafix option in SilverFast. In almost all cases, I did not turn on color cast correction. I found that all four film stocks were easy to scan. None of them suffered from cupping, which made it easy to get the film to lay flat in the holder.
All post processing was done in Lightroom Classic. I did no color grading. I applied a medium contrast curve to all images. I also set the white and black points and added a wee bit of clarity and vibrance (6 for both). On the window images I added a bit of dehaze to reduce glare. Sharpening was left at the Lightroom default of 40. I don't really worry about grain, so I haven't evaluated these images for that. What I do care a lot about is the color palette. I tend to prefer a warmer color palette. That is the key reason I haven't tested any Fuji films, as I've found through the years that the Fuji color palette is much too cool for my taste. I also care about saturation and contrast. I prefer less aggressive rendering on both those factors. So after all this experimentation, you might ask if I've changed my mind about my favorite color film. The short answer would be no, I still prefer Portra 400, but I could see myself shooting more Portra 160 during the long summer days. And if I'm trying to stretch my film budget, I wouldn't hesitate to shoot Kodak ProImage 100. As far as Ektar is concerned, I find the color palette and contrast are just too punchy for my style. But if that's your thing, Ektar delivers it in spades. 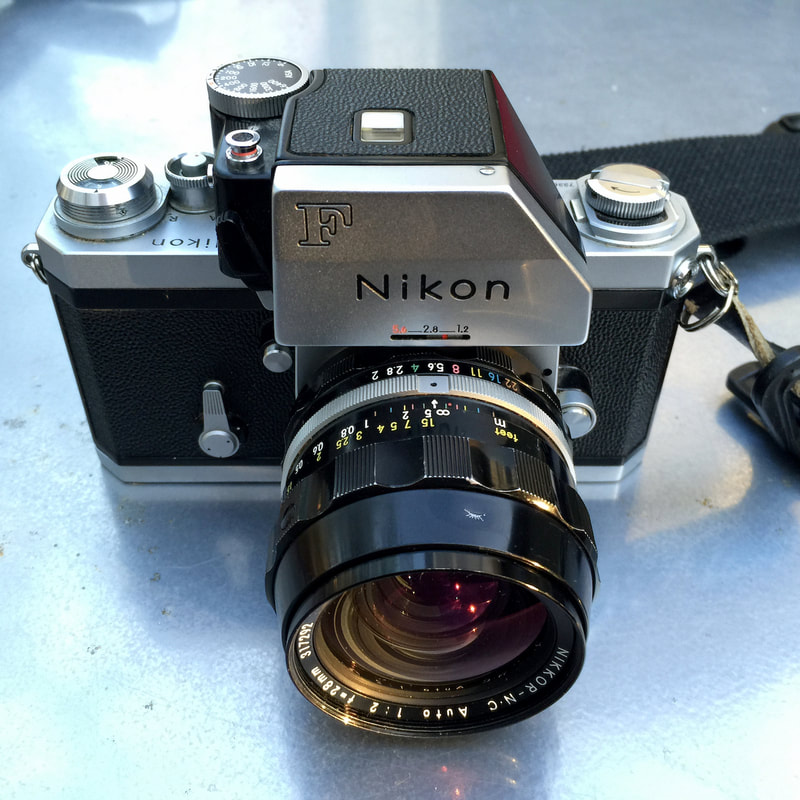 In film photography circles, there's this implicit assumption that when you "grow up" as a photographer you'll move up to the larger film sizes--medium format (i.e. 120 film) and large format. By that benchmark, I guess I've never grown up. There are times I've been tempted to try medium format, and in fact last year I did for a short while. I picked up a 1950s vintage Mamiya 6 Automat folder camera. While I liked the look of the photographs from that camera, I couldn't get comfortable with the viewfinder, so I sold it on eBay. Actually, my very first camera back in 1969 was a medium format folder, the Kodak Duo 620. I didn't shoot it for long before moving to 35mm on an Argus rangefinder. Once I started shooting 35mm SLRs back in the 70s, I was hooked. 35mm film cameras allow you to get in to capture photos in tight places quickly. That's why they became standard equipment for photojournalists, conflict photographers, and street photographers. If you're into the reportage style of photography made famous by Henri Cartier-Bresson, then 35mm is for you. Another advantage of 35mm is the cost of the film. I just checked on B&H, and a 36-exposure roll of Ilford HP5+ black & white film costs the exact same amount as a roll of the same film in 120 format, which will yield 12 exposures on average. True, if you're after higher resolution or that medium-format/large-format look, then you'll have to move up to those larger film formats. For me, there's a low-fi look to 35mm film that I just simply love. 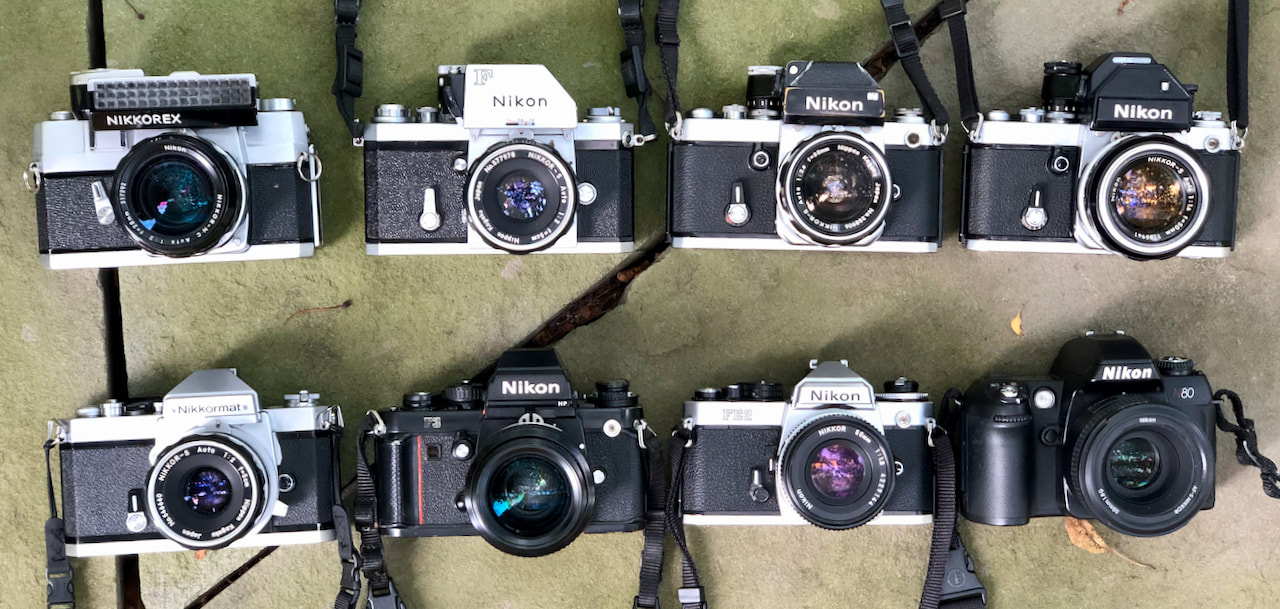 Finally, there is the availability and cost of the used 35mm SLRs. These cameras are the best value going on the used film camera market. True, you can find less expensive medium format cameras, but the good ones still go for more than 35mm SLRs, and for the most part, they are significantly bigger than 35mm SLRs. And don't get me started on 35mm film rangefinders. Those prices have gone crazy. For me, it's 35mm film SLRs all the way. And if you can't tell from the photo above, I have a soft spot in my heart for Nikon cameras.
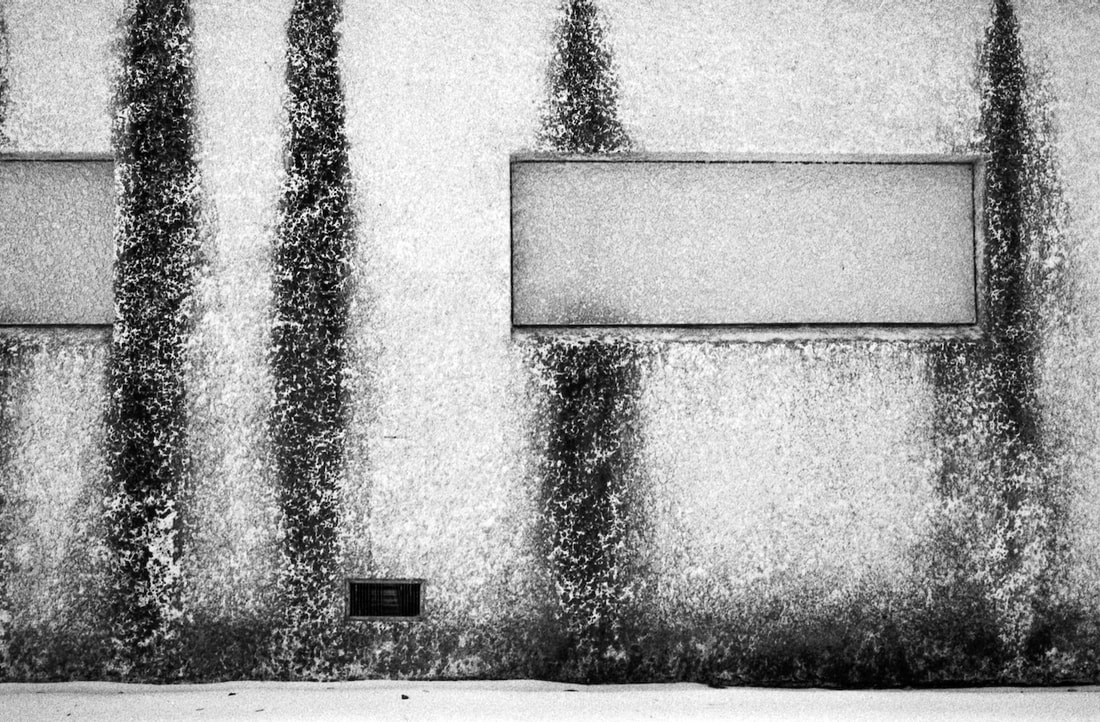
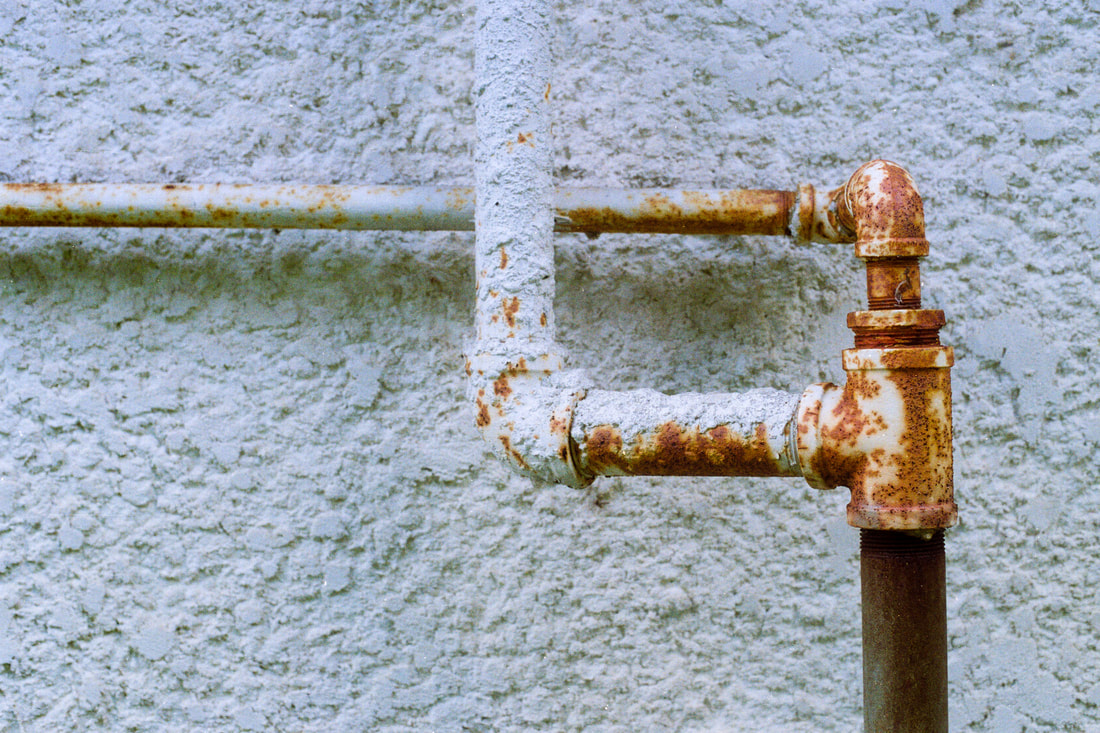
One of the activities that fills my time while we live under this "Stay at Home" order is developing film that I've shot on my walks around the neighborhood. I've been shooting black & white film, because I only have chemistry for that at present. I do have some color chemistry coming though, so I'm going to start shooting some color as well. 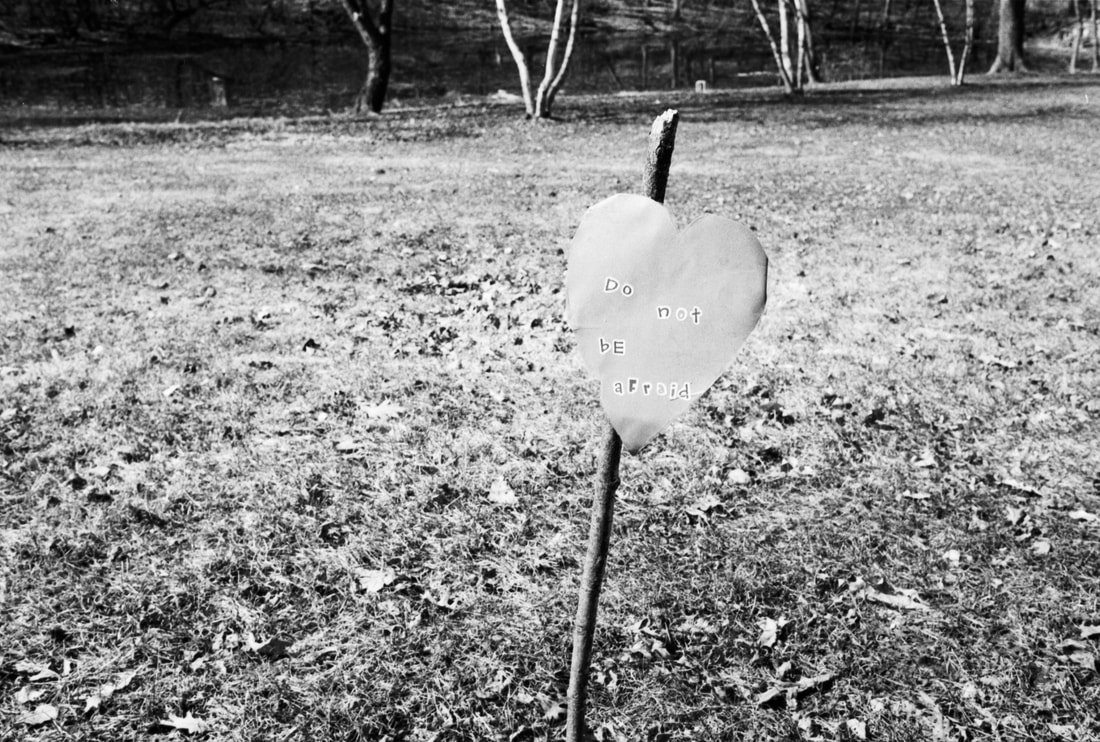 There is something satisfying about getting my process down for developing film. These days when so much seems out of our control, it's comforting to perform a process that I do have some control over. I've gotten to the point where I'm getting consistently good results. I've settled on one developer–Kodak HC-110. I love the tones and contrast I get with this developer. The other thing I appreciate about HC-110 is its long shelf life. 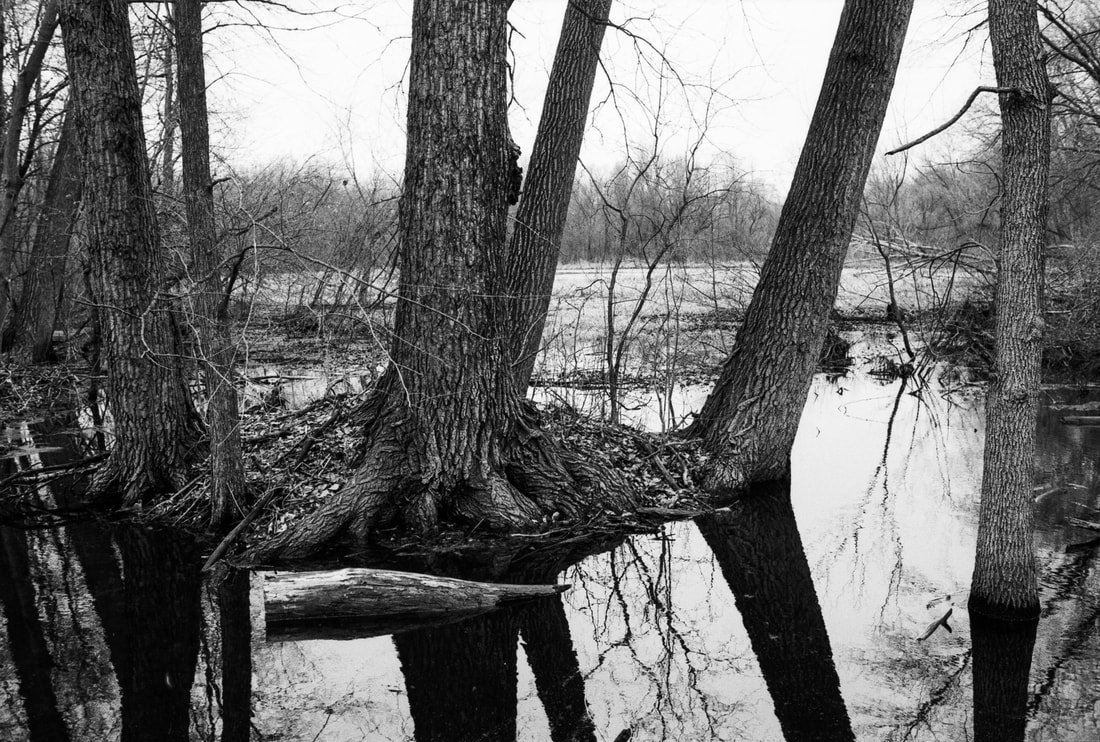 I'm using a hybrid analog/digital workflow, as are the vast majority of photographers shooting film these days. Up through developing the film, the process is analog. After that it becomes a digital process. I scan the negatives and import the scanned files into Lightroom for final image adjustments. I don't do a lot of editing in Lightroom, mainly tweaks to contrast and the tone curve. I also clean up the odd dust spot. I'd love to have a darkroom for printing, but that's something for another day. 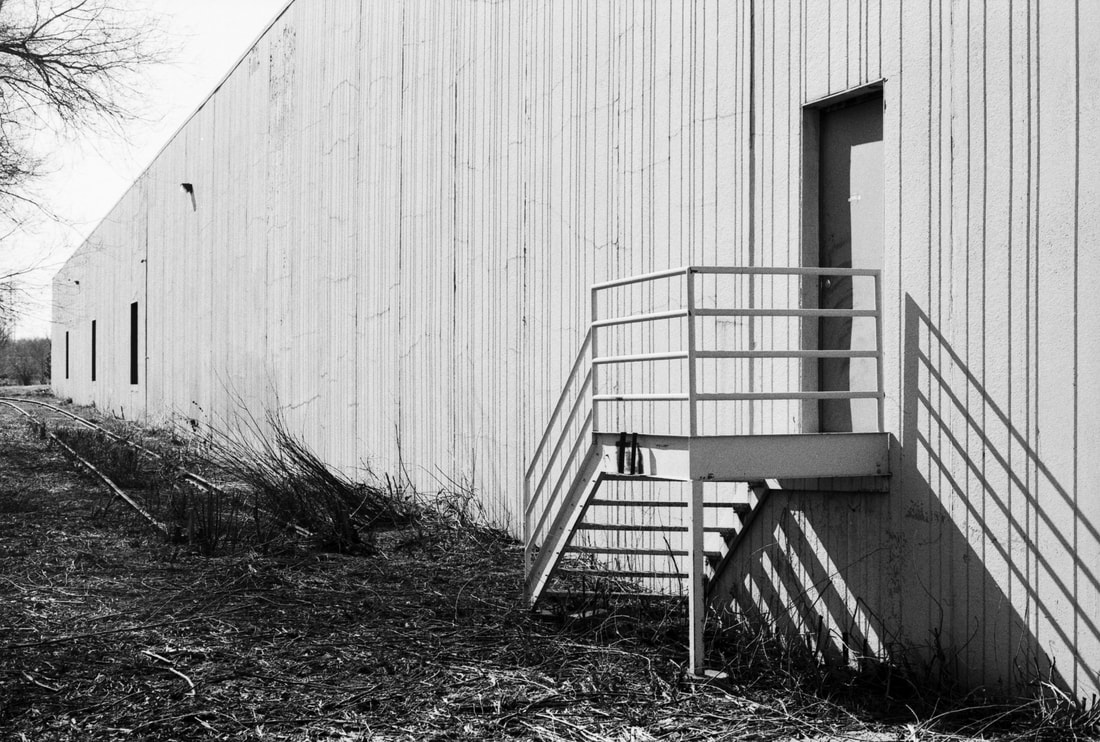 Living under a stay at home order, my photography is limited to what I see on my nearly daily walks and what catches my eye around the house. I think this has been a good creative exercise...forcing me to find interesting images in the mundane. I guess when your world gets smaller, you notice more things in that world, such as an outlet box that looks like an electrical inspectors nightmare, or groceries delivered to the porch, or an arrangement in a planter, among other things. Soon I'll write about another pursuit that's been filling my days, making sourdough bread. I need to make some good photos of that process and then I'll share them here.
 I'm sure it won't surprise you that I have a few opinions about what cameras are best to start out with when getting into film photography. Some of the cameras that I recommend are on other's lists, but other commonly mentioned cameras are not on my list. Read on and you'll get my take on best cameras for getting started in film. First, I'm going to step out on a limb and state that the best camera type for starting out in film is a 35mm SLR (single lens reflex). Here are my reasons for making that claim. SLR Shooting Experience With an SLR, when you look through the viewfinder you see what the camera sees. The image coming through the lens is reflected up to the viewfinder using a mirror and prism. You are seeing the image as it will be captured on film, not a rough approximation of it. An SLR viewfinder typically shows you 93% - 100% of the total image. I am a stickler for doing edge patrol on my frames, so an accurate representation in the viewfinder is extremely important to me. Affordability The best values going on the used film camera market are 35mm SLRs. Even though film camera prices have increased with the resurgence of film photography, it's still easy to find good condition 35mm SLRs for under $250. Conversely, the prices on point & shoot and rangefinder 35mm cameras have increased to crazy levels. 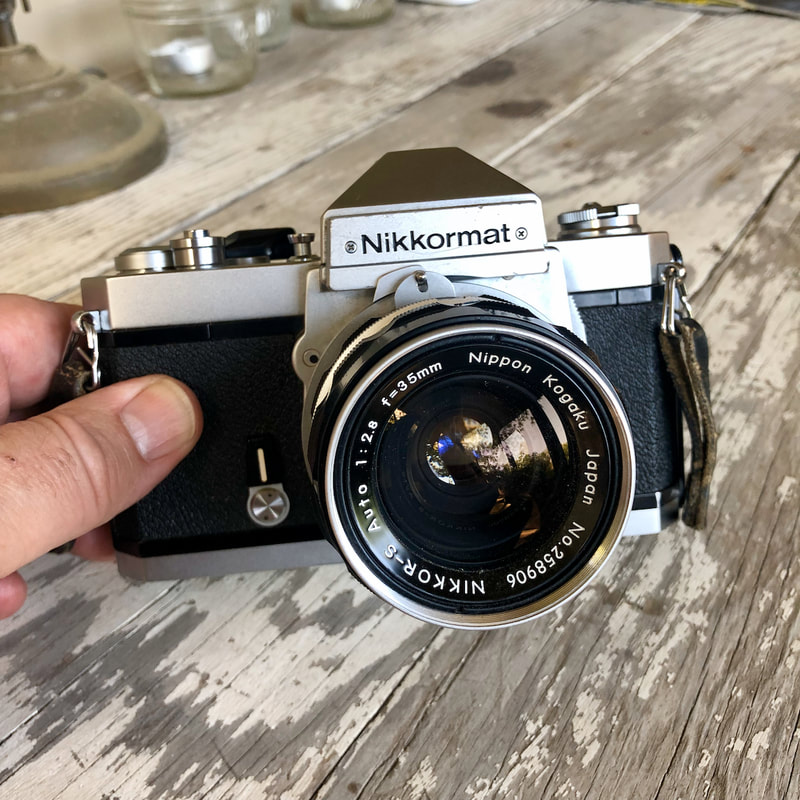 Portability 35mm SLRs are among the most portable cameras available. Some of the more modern 35mm SLRs are beautifully compact, such as the Olympus OM-2n. The Nikon FE2 is another great example. Both these cameras are extremely well built, though, so don't confuse compact with cheaply constructed. 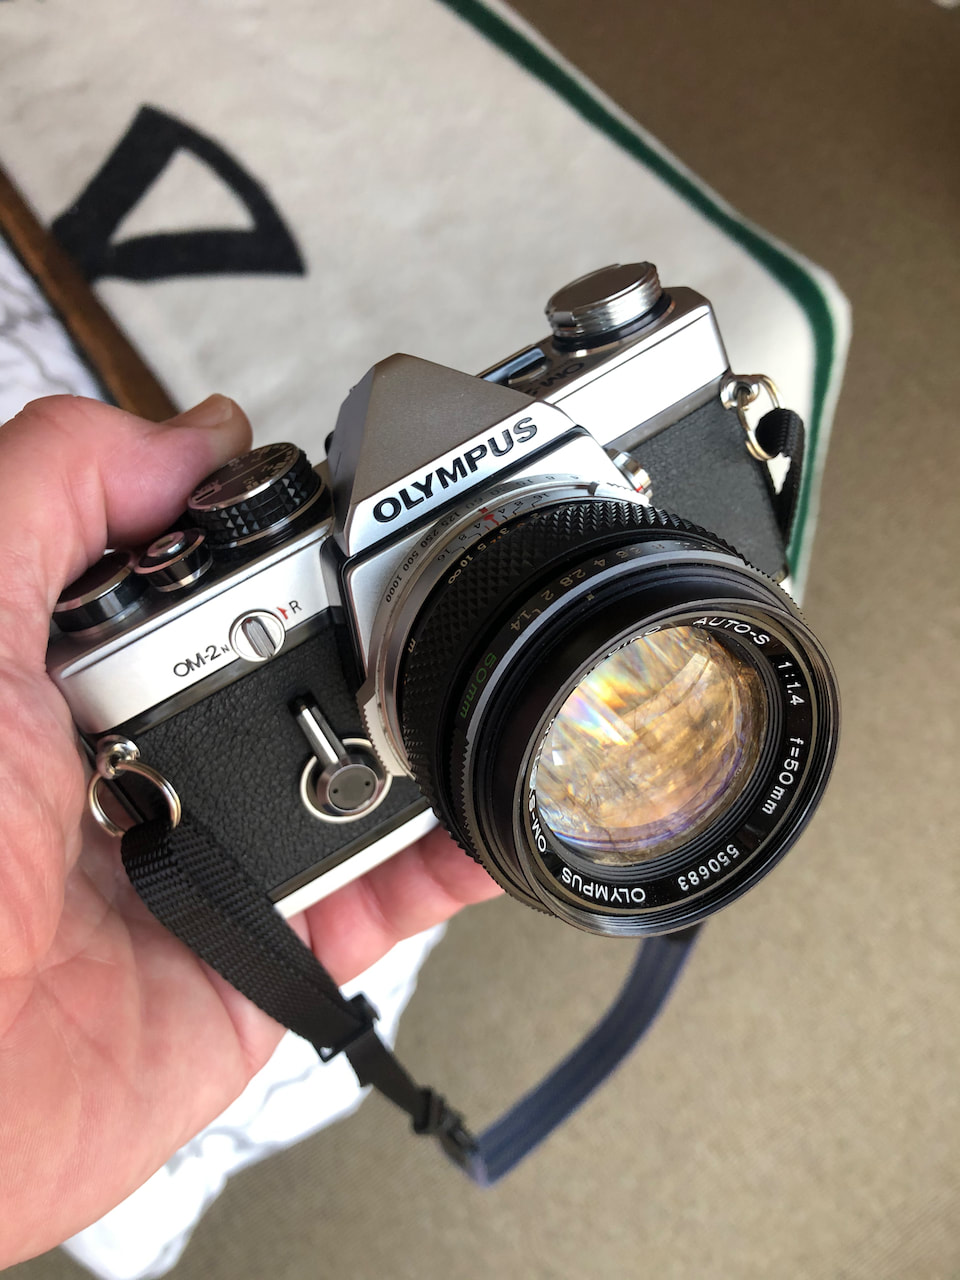 Availability In their day, 35mm SLRs were super popular, and for the most part, they were extremely well built, so a good number of them are still working and available today. For example, the Nikkormat FT2, which was a brand of Nikon, is available for under $100 in good condition. If you're not completely comfortable with your knowledge in making a purchase, I'd turn KEH, a reputable online retailer of used cameras. If their rating says a camera is in excellent condition, you can count on it. You can also look on eBay, but you have to be more careful there. I've actually found prices to be better from KEH than eBay. Another good buying option is your local camera store. Most have an inventory of used film cameras. I bought my Nikon F3 from my local camera store, National Camera Exchange. 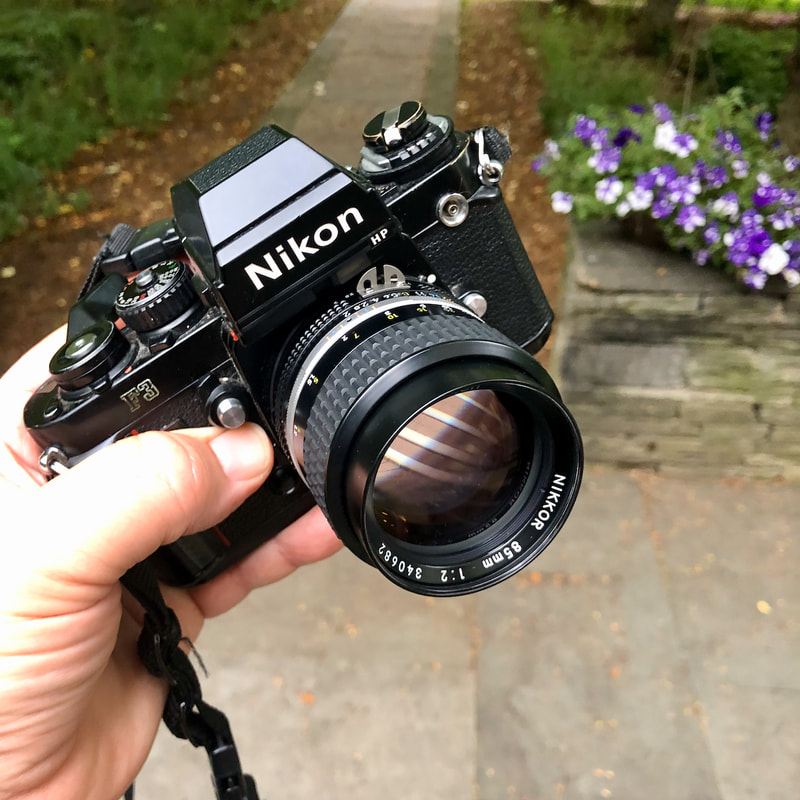 My camera recommendations are based on actual shooting experience. If I haven't shot a camera, I won't recommend it. I'm targeting my recommendations at the inexperienced film shooter. Here are my criteria for recommending cameras from among those I've shot.
My Camera Recommendations
I fully admit that my list is not exhaustive, and yes, there certainly is a Nikon tilt to my recommendations, since that is the brand I have the most experience with. There are a lot of fine brands I haven't shot, including Minolta and many other Canon and Pentax film cameras. I'd rather stick with my own personal experience when making a recommendation. If you were to ask me to recommend one camera from all the 35mm SLRs I've shot, I'd go with the Nikon FE2, with the Olympus OM-2n a close runner up. If you're looking for the most affordable option I'd go for the Nikkormat FT2. Those can typically be had for less than $100.  Lenses
A camera isn't any use without a lens. I recommend for starters you get a 50mm fixed focal length lens from the camera manufacturer. Generally, these are going to be f/2 or faster lenses. The 50mm lens was the standard kit lens in the day, so there are a ton of them available at reasonable prices. Once you've got the standard lens covered, then you can start expanding your collection. But for starters, it's hard to go wrong with a good old 50mm prime lens. If you're buying a Nikon film SLR, you need to be sure that the lens you're considering is compatible with the camera body. Conclusion If you have any questions or want feedback on a potential camera purchase, please submit a comment. I'll do my best to get back to you. |
AuthorTom Northenscold Archives
December 2022
Categories
All
|


 RSS Feed