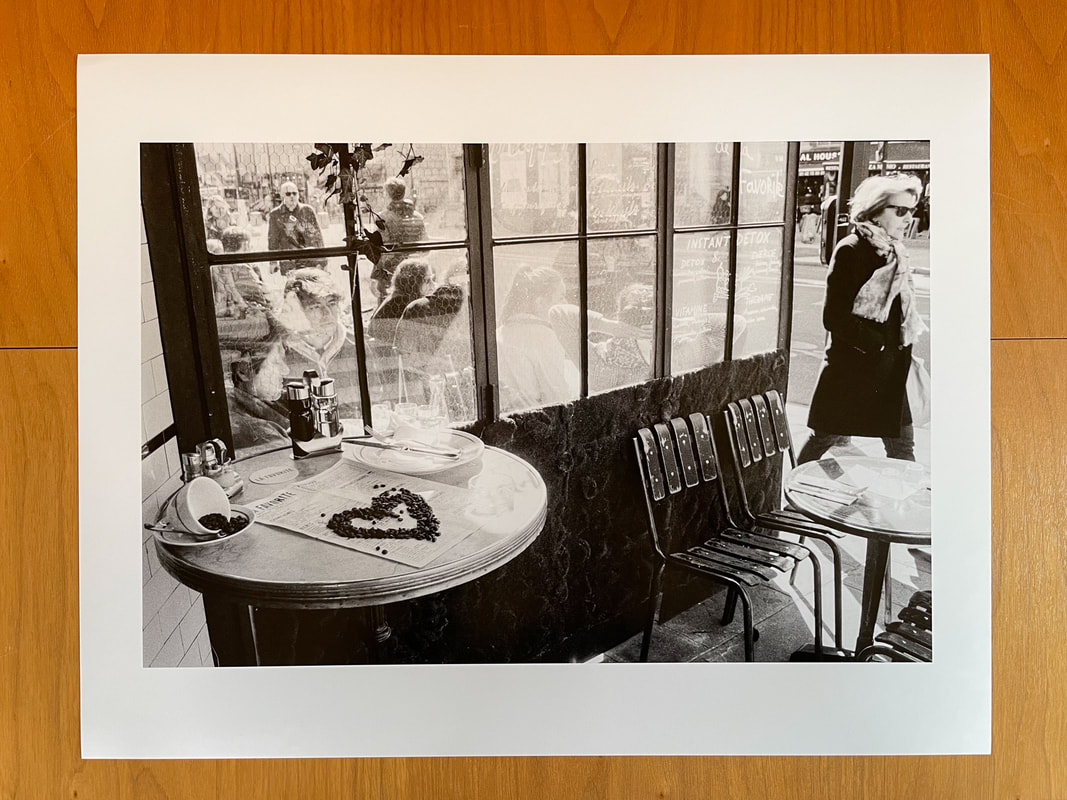
 Paris Cafe: 13" x 19" print from a 35mm Kodak Tri-X negative One of the commonly mentioned dings against 35mm is that you can't or shouldn't attempt to make large prints with it. Well, I'm hoping to debunk that myth in this blog post. What I will provide for you is my workflow from beginning to end for getting beautiful, 13" x 19" archival inkjet black & white prints from 35mm negatives. First, a list of the gear and software I will use along the way. Equipment/Software:
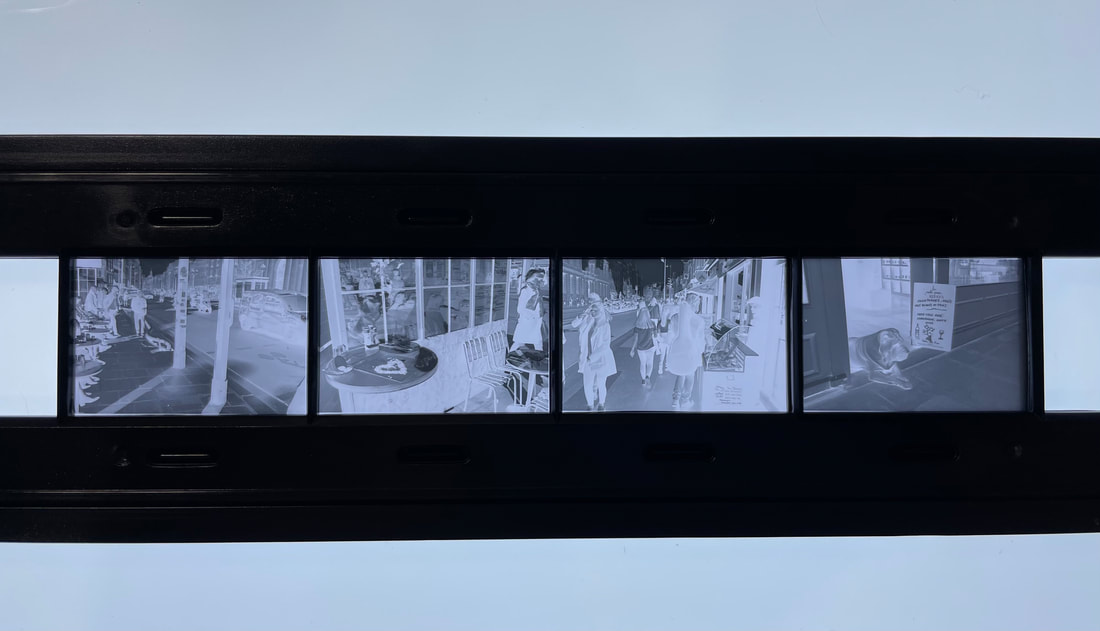 Workflow Steps: The first step is to place the negative in the scanning tray and get it cleaned. I find it helps me to see the borders clearly by putting the tray and negative on an LED light table (these are super affordable). Once I get the negative placed and locked in, I give it a good blowing with a Rocket Blower front and back. 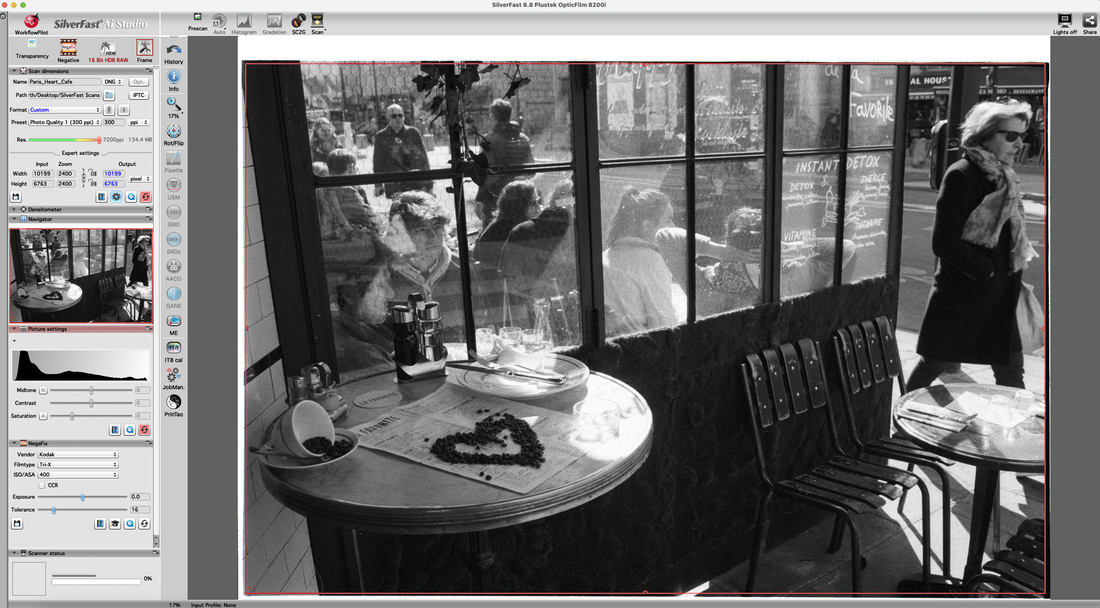 Next I'll walk through the settings in SilverFast. The first thing I do when I open SilverFast is conduct a Prescan. Once I have that, I make sure that the red selection box is sized properly. All of the settings are shown on the left panel. I won't go over all of those, but a couple are of special importance. First, I select 16 Bit HDR RAW for my scan type. I only use this scan type when I'm planning on making a large print. This will create a digital negative of the image. I select DNG for file type. You could probably use TIFF as well. This next setting is the one where I go outside accepted bounds. I set the scan resolution to the greatest allowed by the 8200i, which is 7200 ppi. Reviews will tell you that the effective resolution of this scanner is closer to half that, so the argument is that you shouldn't scan at a resolution greater than 3600 ppi because all you're getting is a bigger file with no more detail. I've tried up-sizing files scanned at 3600 ppi to the print size needed, and the results aren't nearly as good. What I found is that the shadows get super dirty, for lack of a better term. So believe me, while you are not gaining effective resolution scanning at 7200, you are getting a cleaner file to work with downstream. I use SilverFast's NegaFix option on all my scans. I find it does a fabulous job rendering the negatives. I don't use any of the auto color correction options. Once I've named my file and told SilverFast where to store it I hit the Scan button and let the Plustek do its thing. 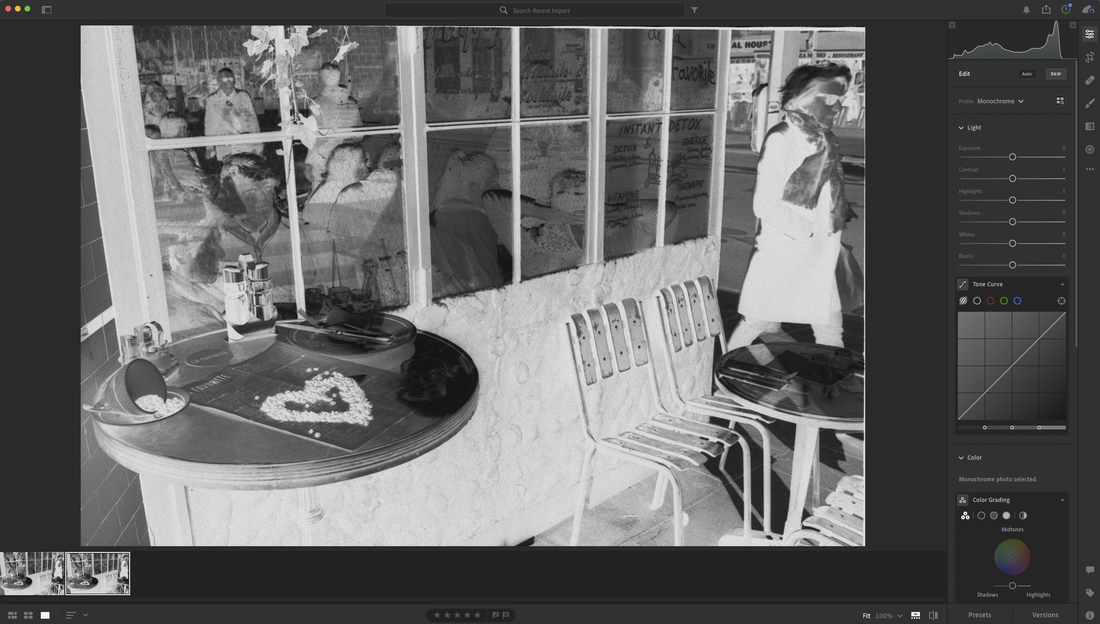 Once you import the file into Lightroom (I'm using CC) you will see a digital negative on the screen. At this point I don't do anything with the image other than choose Edit in Photoshop. 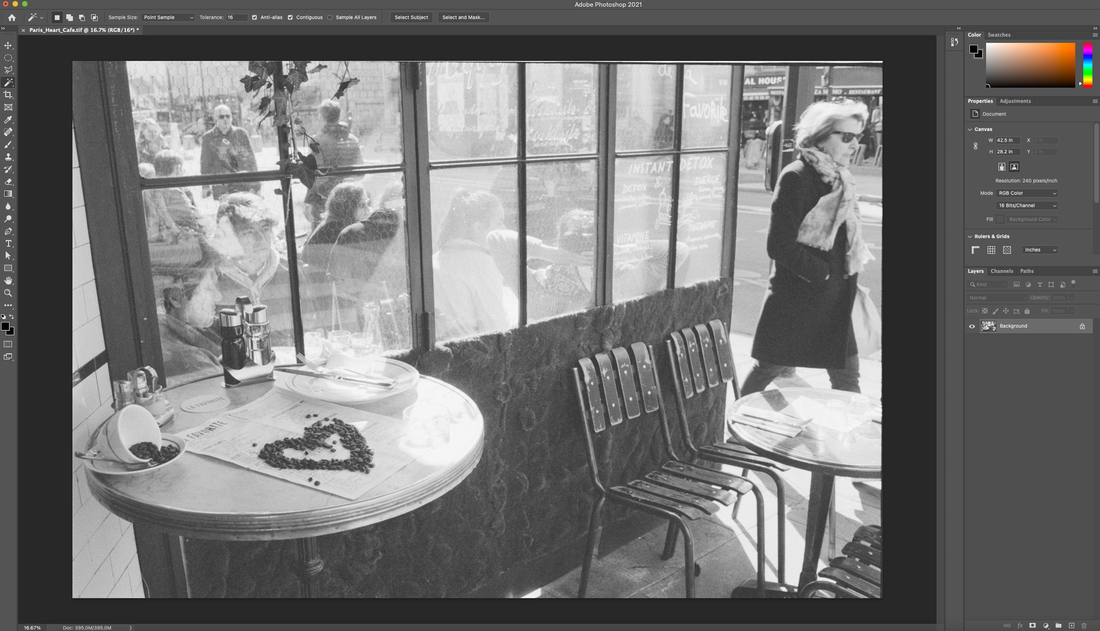 When the file opens in Photoshop it will still look like a negative. At this point I use Photoshop for just two processes. First I choose Image>>Adjustments>>Invert. Now the image looks like an extremely flat positive. Don't worry about that. We'll fix that in Lightroom. The next step I do in Photoshop is to resize the image by choosing Image>>Image Size and then make the settings shown below.  To get a 13" x 19" print at 360 ppi, which is optimal for my Epson, I need to downsize the file to 6840 pixels on the long side. For the resampling choice, I use Bicubic Sharper (reduction). To be honest, I haven't tried the other options. This one just works for me. Once I execute the image size command I'm all done with Photoshop. I save the file in Photoshop and then quit Photoshop to go back to Lightroom. 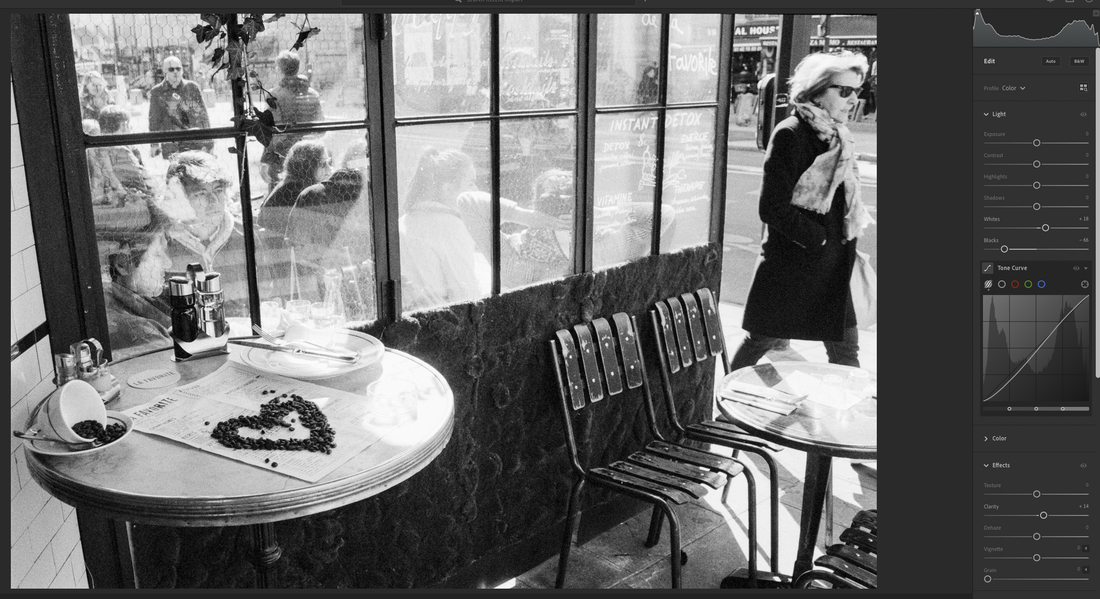 Now I am back in Lightroom, and here is where we start to bring the image to life. The first thing I do is set the white and black points to taste. This alone makes a huge difference in the tonalities. Next I adjust the tone curve. I added a bit of an S-curve to this image. I also added a bit of Clarity.  Finally, I set sharpening to the Lightroom default level of 40. Other than some minor use of the healing brush, this image is ready to print. Because I'm using Lightroom CC, and because Adobe for some unknown reason didn't think printing was important enough to include in CC yet, I have to go back into Photoshop to print. Annoying, yes, but it is doable. 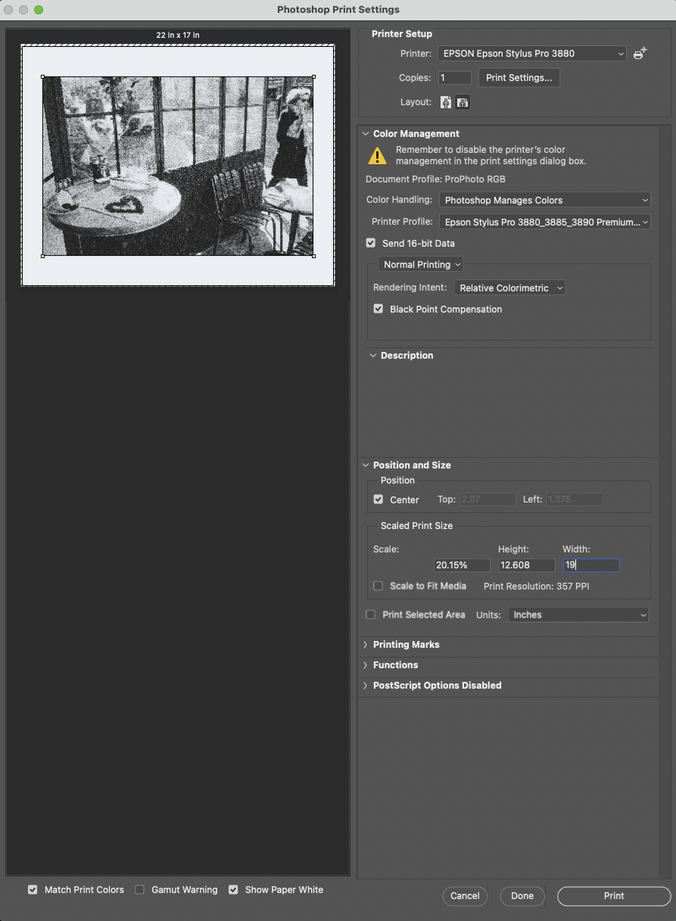 Now I am back in Photoshop in the Print dialog. The settings here are super critical. Besides selecting my printer, I tell Photoshop that it should manage colors and I select the proper icc printer profile. I select 16-bit data and black-point compensation. In the Layout section I choose landscape orientation. Down in the Position and Size section I input the width and let Photoshop auto calculate everything else. You'll see that the image isn't exactly 360 ppi because I did a wee bit of a crop. I'm not going to worry about that. In Rendering Intent, I've found Relative Colorimetric to be my preferred method, so I just leave it at that. I doubt that has much impact on a black and white image anyway. And then all that's left is to hit the Print button. I've shown the resulting print at the beginning of the blog post, so I won't repeat that here, but what I will do is include a slideshow of a series of closeup photos from the print made on my iPhone 12 Pro. Now I'll be the first to admit that I am not a pixel peeper. When I'm making a large print, I keep in mind the typical viewing distance. To be honest, I could probably be printing at a resolution much lower than 360 ppi for such a large print as 13" x 19", but 360 ppi is what makes my Epson happiest, so that's what I stick with. Certainly looked at close up you're going to see the film grain, especially on a 400 speed classic grain film like Tri-X. But frankly, I like grain. Maybe not big chunks of it, but salt and peppery grain I'm more than happy with. And that's the way the grain looks to me on this print.
A caveat...the scanner is the critical element of this workflow. I don't think you'd get nearly as good of results with a flatbed scanner. This is where a dedicated film scanner really comes in handy. The Plustek film scanners are a terrific value and a great choice if you're looking for a dedicated 35mm film scanner. I hope this has been helpful. As always, if you've got a question just send me a note or post a comment.
1 Comment
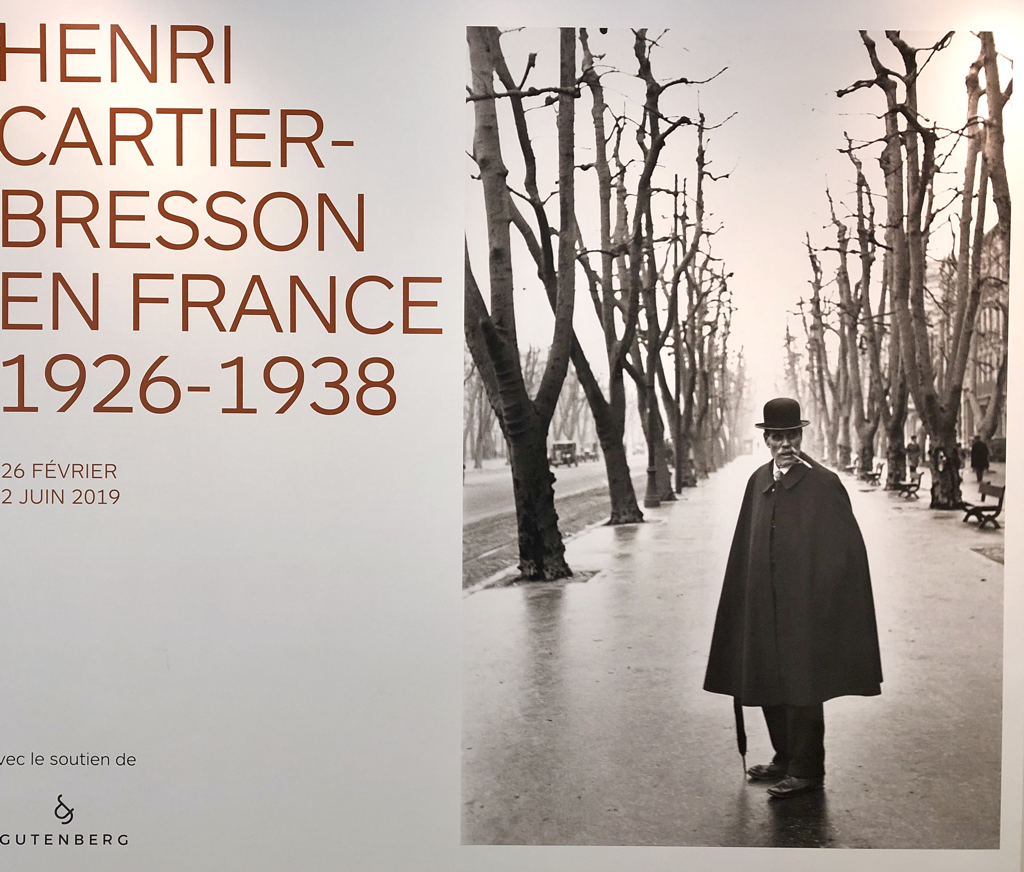 Poster at Henri Cartier-Bresson Museum In the past two days we’ve taken in two fine museums within walking distance from our flat, the Picasso Museum yesterday and the Henri Cartier-Bresson Museum today. The Picasso Museum is housed in what used to be a hotel. It had been closed for five years for a major renovation project, reopening in 2014. The first time we tried to visit the museum in 2009, the line was all the way down the street and it was raining, so we opted out. In 2011 we couldn’t visit due to the renovation. The third time was a charm. The crowds were light and the weather beautiful. The exhibits at the Picasso Museum are incredibly extensive. In total there are 38 rooms with work displayed. The first two floors house a joint Calder/Picasso exhibit, Calder was an American artist (primarily sculptor) who also worked in an abstract style. The upper floors of the museum are dedicated to Picasso’s works. The curation and display of the work were top notch. Priscilla and I agree that this is one of the most impressive museums we have ever visited. While I doubt Picasso needs any introduction, Cartier-Bresson might. Henri Cartier-Bresson was one of the great photographers in the reportage style. He was a founding member of the famous Magnum photography agency. Before his death, Cartier-Bresson and his wife and photographer, Martine Franck, set up a foundation with the mission to preserve and share his work. Today we saw the photographs of Guy Tillim, in a body of work entitled “Museum of the Revolution,” and the work of Cartier-Bresson from France during 1926 - 1938. All of the work was fabulous. I could look at Cartier-Bresson’s beautiful black and white prints all day. Tillim’s huge panoramic street scenes from several post-independence African countries were amazing. I picked up a copy of Cartier-Bresson’s seminal book, “The Decisive Moment.” I’ve not been able to find this book in the States. 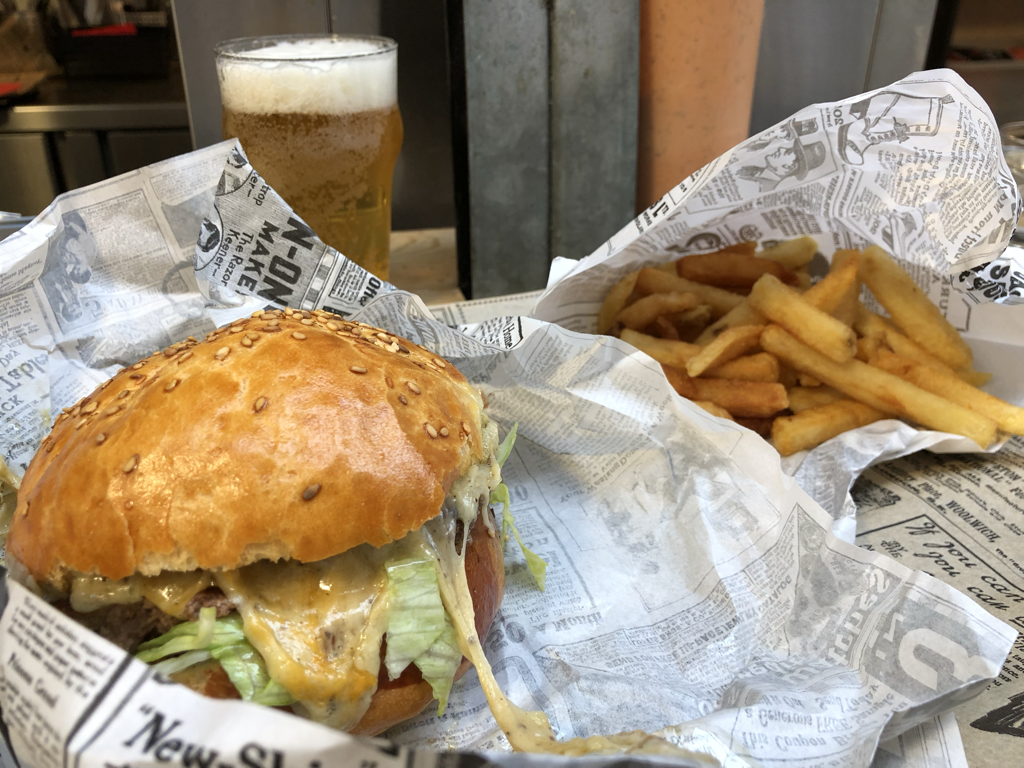 No judging! It was as good as it looks On our way back to our flat we stopped at a French burger joint—yes they do exist—in the Marché Enfant Rouge. That burger and beer tasted mighty darned good. As we continued on our way home, I split off to get some groceries while Priscilla lugged my Cartier-Bresson book back to the flat. I’ve gotten pretty good with my grocery-store French. I’ve also gotten to a pretty good place with the guy that runs the boutique coffee shop near us where we get our ground coffee. He professes to not having much English, but between my awful French and his slightly less awful English, we get it worked out. The ground coffee you get in the grocery stores is ground super fine for making espresso. It doesn’t work well if you’re making pour-over coffee as we are. By acting it out, I was able to communicate to our coffee guy that I wanted a coarser grind of coffee. He breaks out in a big smile now every time he sees me. 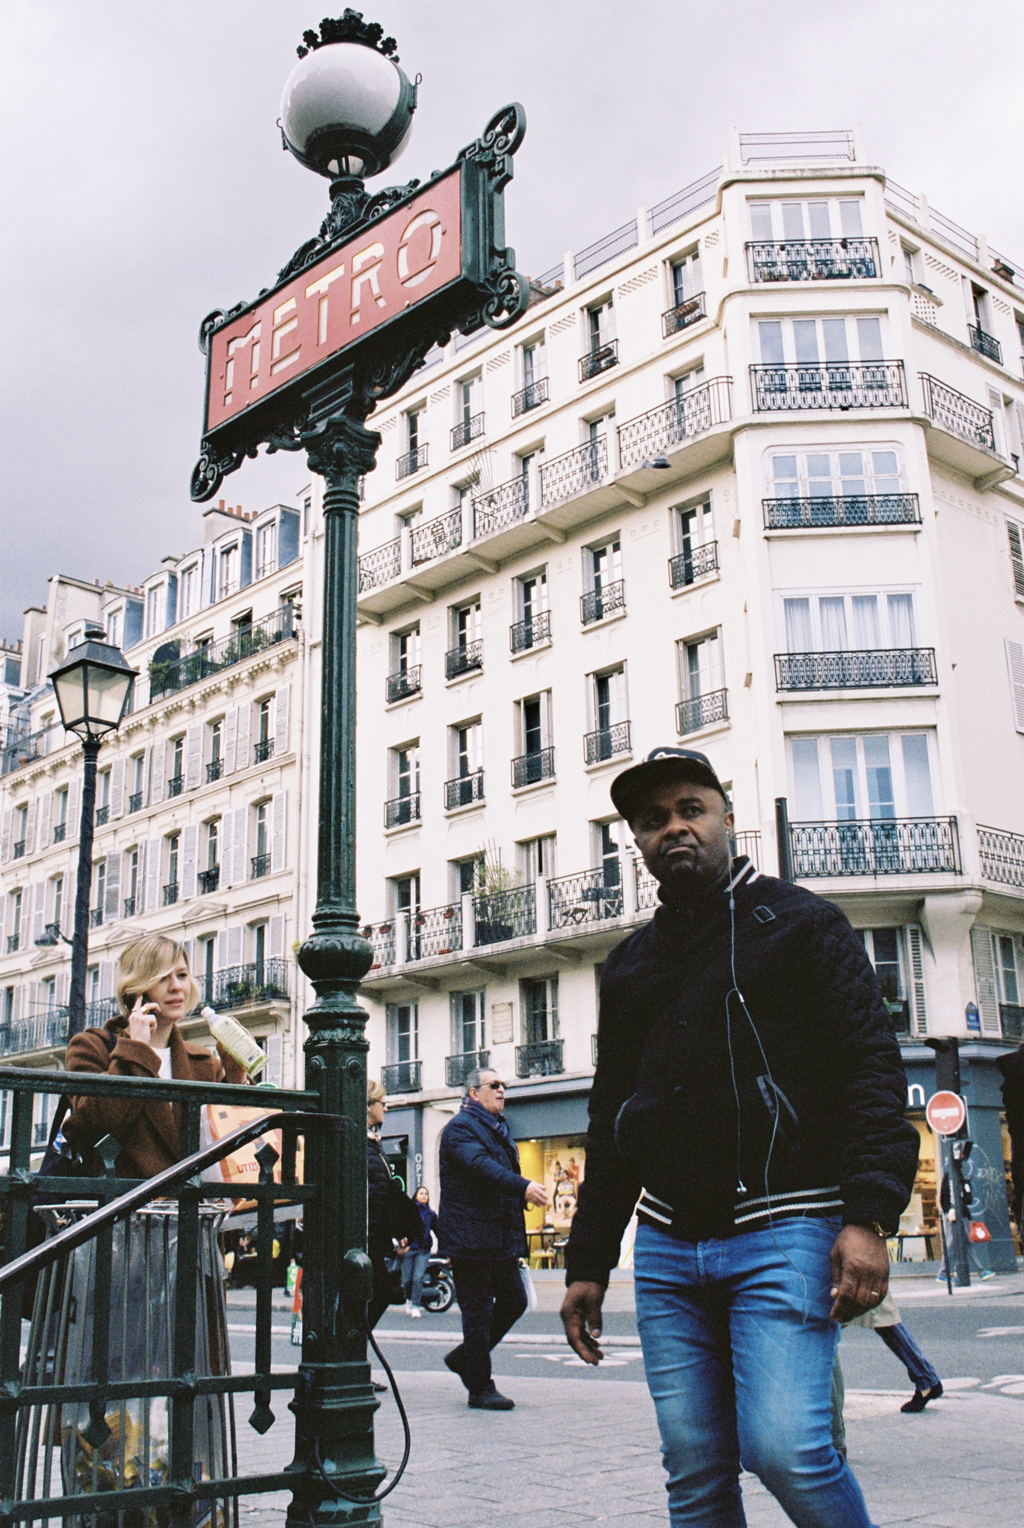 Saint-Paul Metro Station (Kodak Portra 400 on Nikon F3) At this point I probably owe you all an explanation for why I’m shooting film on this trip. Those of you of a certain age may remember the introduction to the animated series “The Jetsons” in which George Jetson is stuck on an out-of-control treadmill, screaming “Help Jane! How do you stop this thing?” Well, that’s a bit how I was feeling with the social media treadmill. I was feeling pressure to get images shared out quickly and I was finding myself craving those likes and follows. Shooting film on this trip is my way of opting out. This ties in a bit to our decision to not post about our trip on Facebook. We didn’t want Facebook owning these memories. The night of the Notre Dame fire, I had two cameras with me, one digital (iPhone X) and one film (Olympus OM-2s, loaded with black and white film). As I was photographing and filming the fire on my iPhone X, the thought occurred to me that I should share something about this, as it was terribly important news. So I shared one photo to Facebook just after seven o’clock local time. Then I went back to photographing and filming. I decided that it was more important that I be in the moment. The thought occurred to me that it would have been better if I’d have had my big Nikon digital camera with me that night, but it was too late for that. I was there and the fire was raging, so I shot with what I had. Seeing the man in the photo below taking a selfie with Notre Dame burning in the background is a sign to me that things have gotten out of whack. Certainly lots of us were making photographs, but why that one man felt the need to place himself in the scene is beyond me. Just to be clear, his reaction was way outside the norm for how the French reacted that night to the tragic Notre Dame Fire. The overwhelming reaction was shock, disbelief, and deep sadness. Don’t get me wrong, this is not a diatribe against all things digital. I’m as digitally connected as the next person, and probably more so. What we are trying to do, though, is to find a happy medium, where the digital world enhances our lives rather than consuming them. Pulling away from that instant feedback loop is one key way of jumping the treadmill. 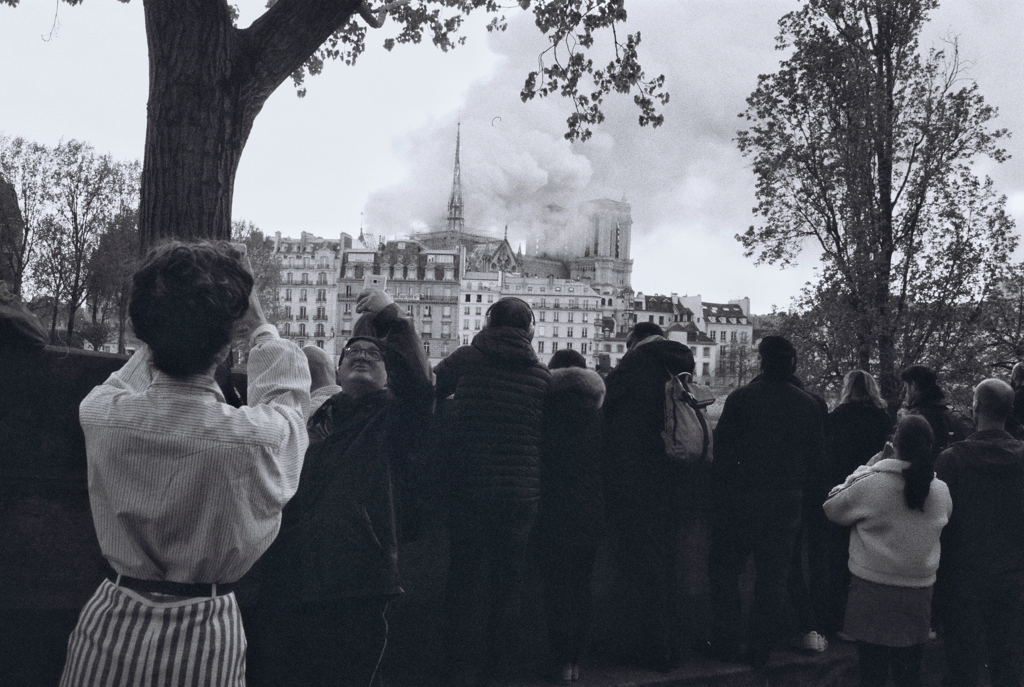 Crowd scene—Notre Dame fire (Kodak Tri-X 400 on Olympus OM-2s) Believe it or not, we’re finally caught up with the goings on here at 24 rue Saint-Paul. I’ll try not to get so far backed up in the future. The next post will be covering Easter Sunday. We have ambitious plans to attend the sunrise service at the American Church in Paris. Priscilla doesn’t quite know how we’re going to pull that off, since we can’t seem to manage to get out of the flat before 11:30 a.m. most days.
|
AuthorTom Northenscold Archives
December 2022
Categories
All
|
 RSS Feed